Getting Started
This page describes the onboarding process to Unaric Voice for Teams. While it provides instructions, this documentation is not meant for replacing guided onboarding to the platform. For assistance walking through these steps, contact support.
Unaric Voice for Teams integrates your Salesforce environment with Microsoft Teams. To this end, you will require to apply several configurations in your org, install the product package, and customize your Salesforce interface.
1. Prerequisites
Before you connect your Salesforce environment to Microsoft Teams, you must check your Voice licenses and enable the underlying infrastructure to start the setup.
Salesforce Voice Licenses
Each Unaric Voice for Teams user requires a Salesforce Voice license. To check your available Salesforce Voice licenses:
- Navigate to Setup > Company Settings > Company Information.
- Under Permission Set Licenses, select Salesforce Voice User (Partner Telephony). If this license is not visible, click Go to list to view all available licenses.
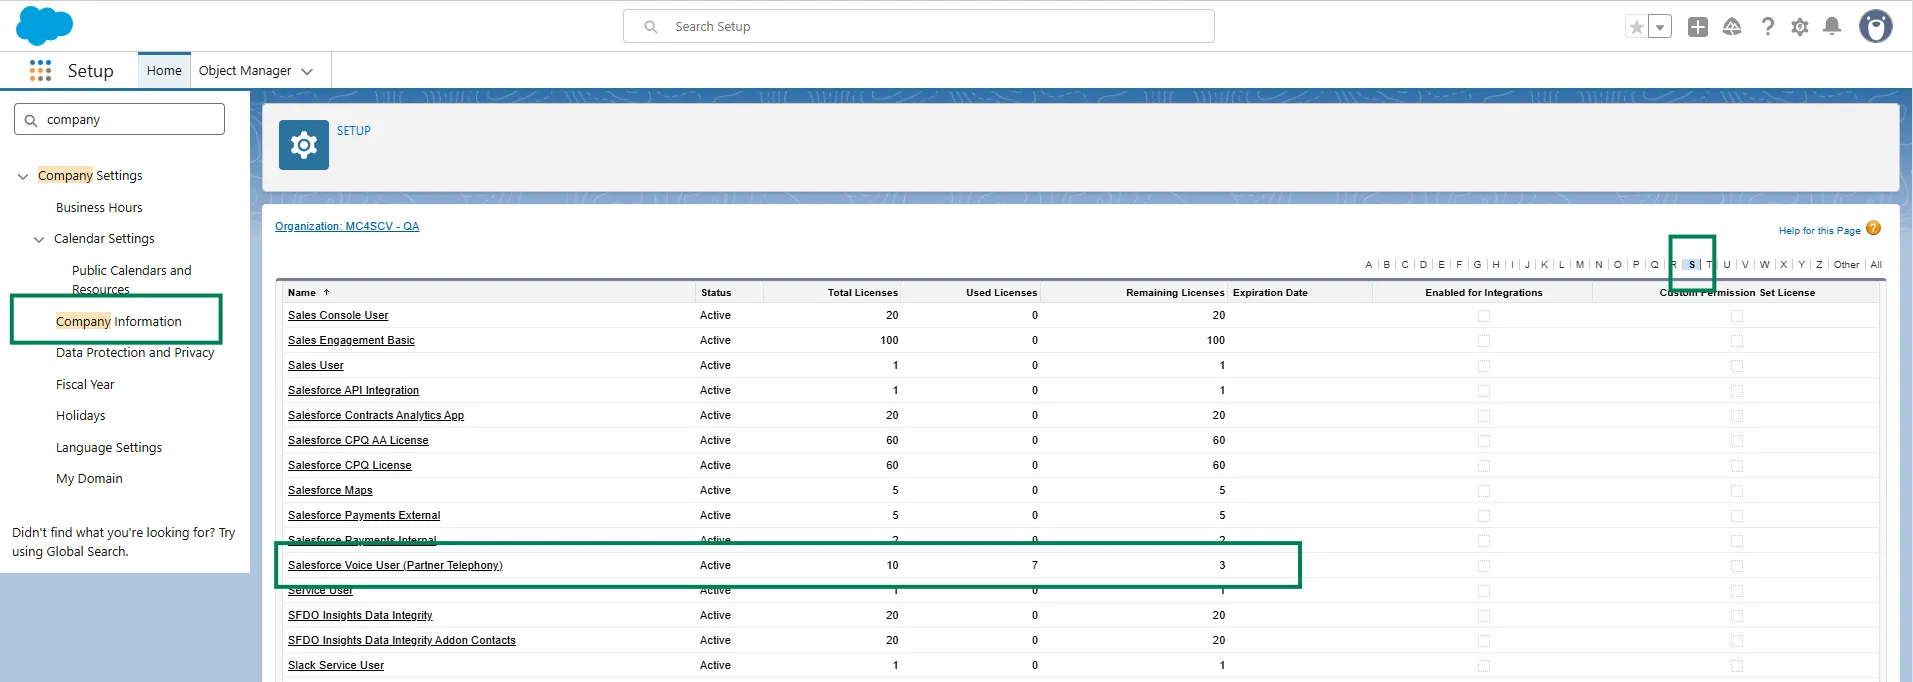
- At this page you will see the total number of Salesforce Voice licenses (seats) and how many are assigned and available.
Enable Voice & assign licenses
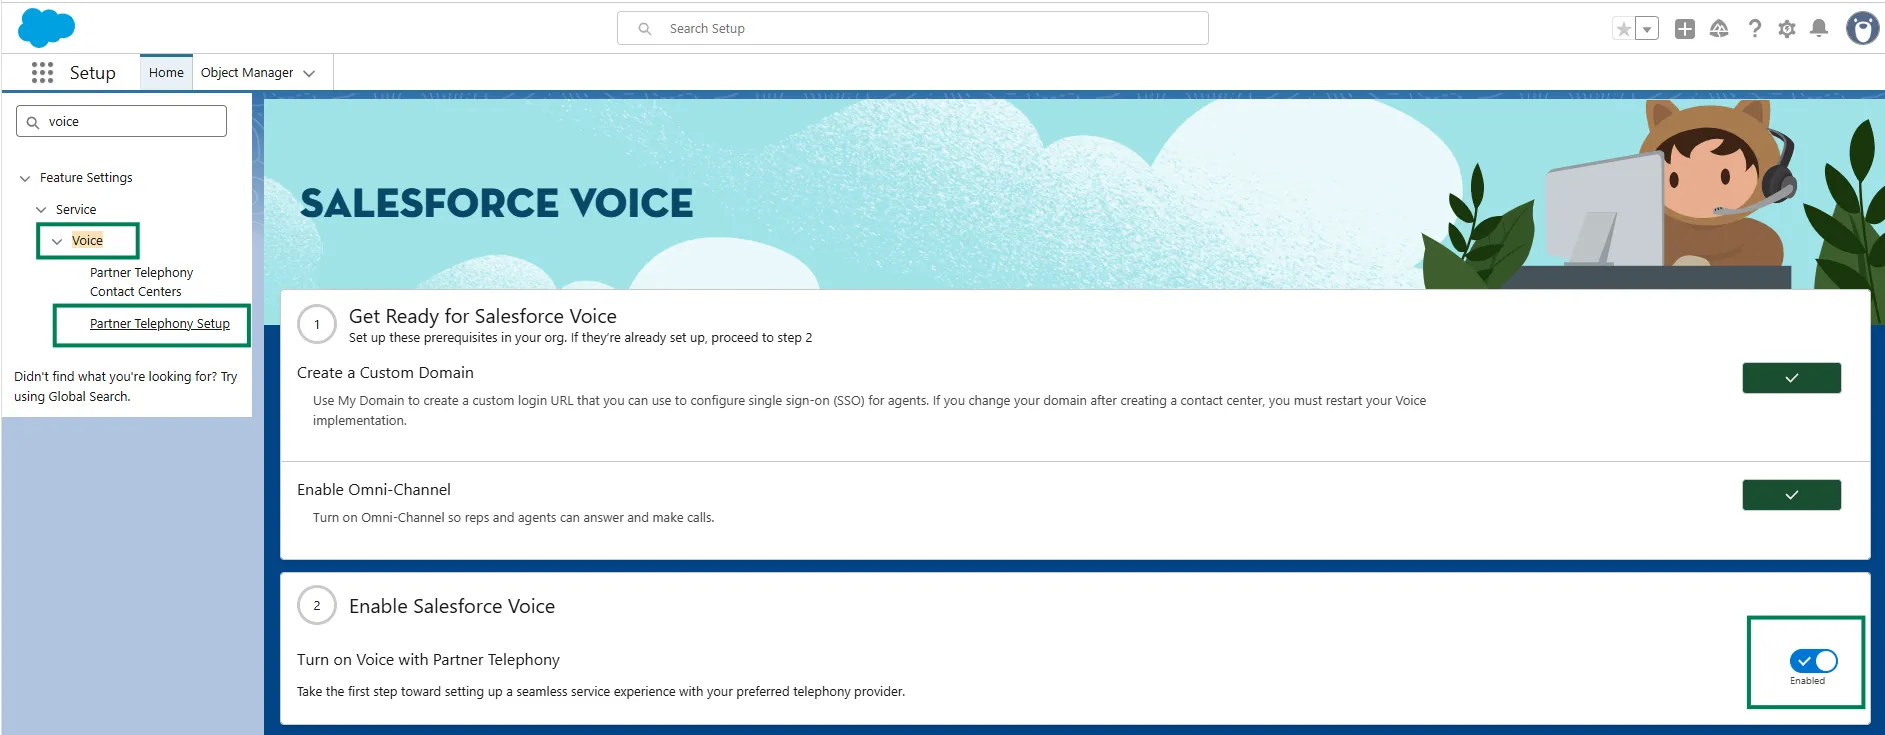
- In Setup, use the search box to open Partner Telephony Setup.
- Toggle on Enable Salesforce Voice.
- Under Set Up Your Contact Center, click Assign Permissions.
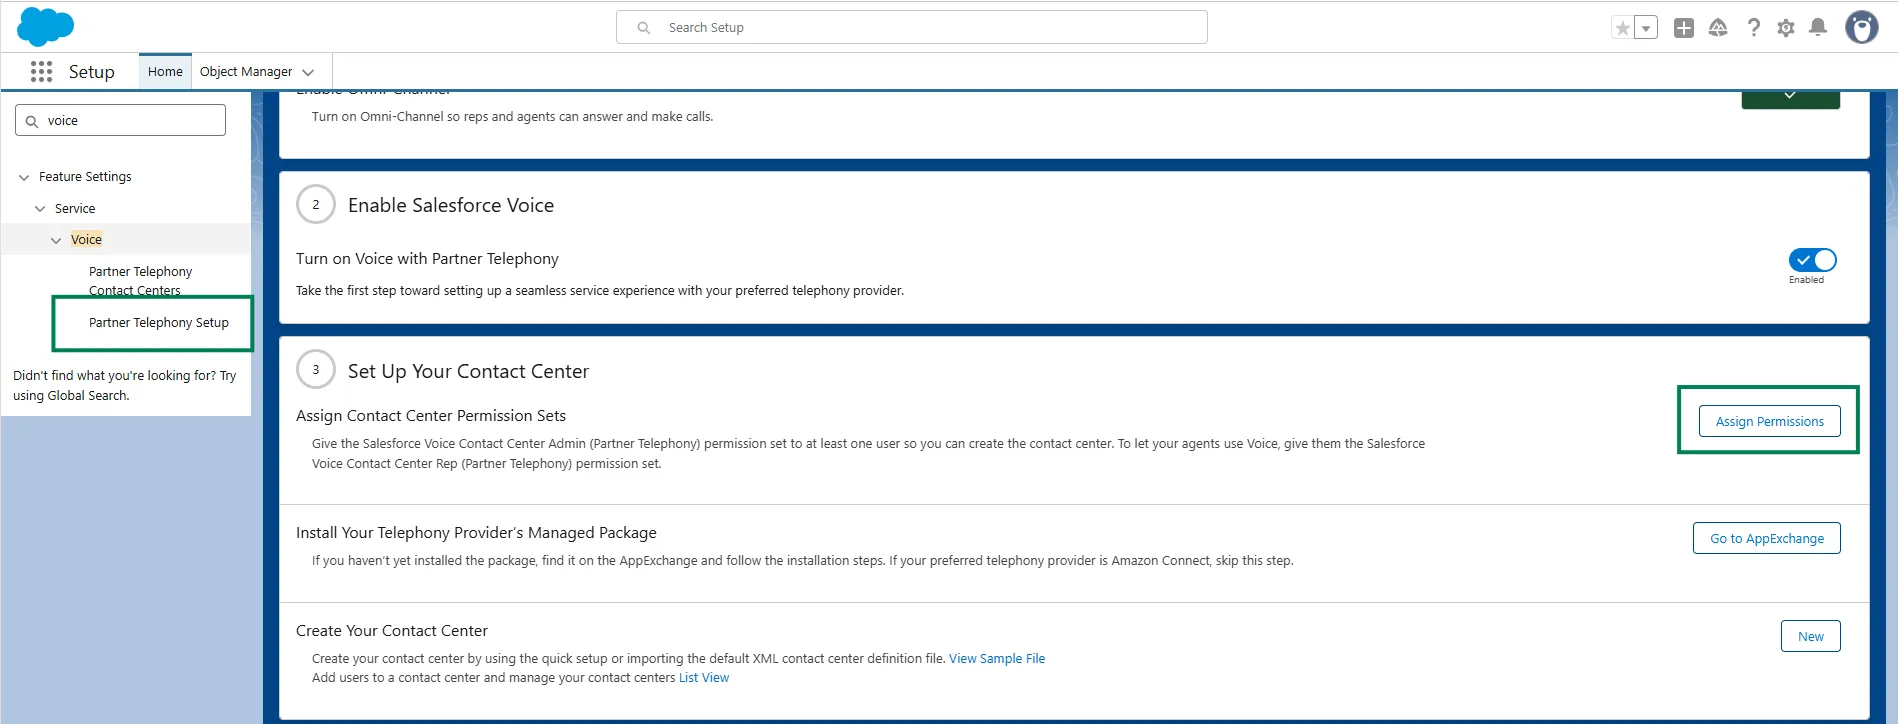
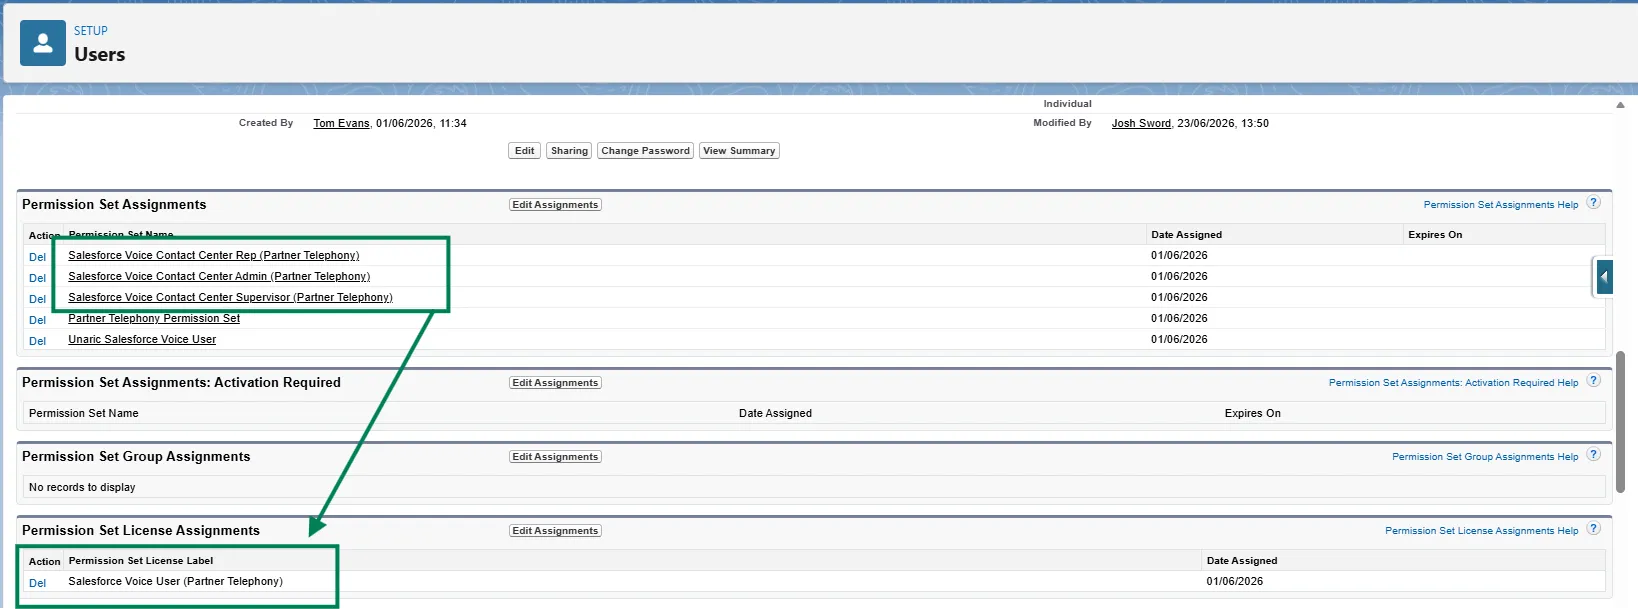
- Assign the necessary Salesforce Voice Permission sets to users. It is required to assign the Salesforce Voice Contact Centre Admin (Partner Telephony) permission set to at least one user. This user will create the Contact Center later on.
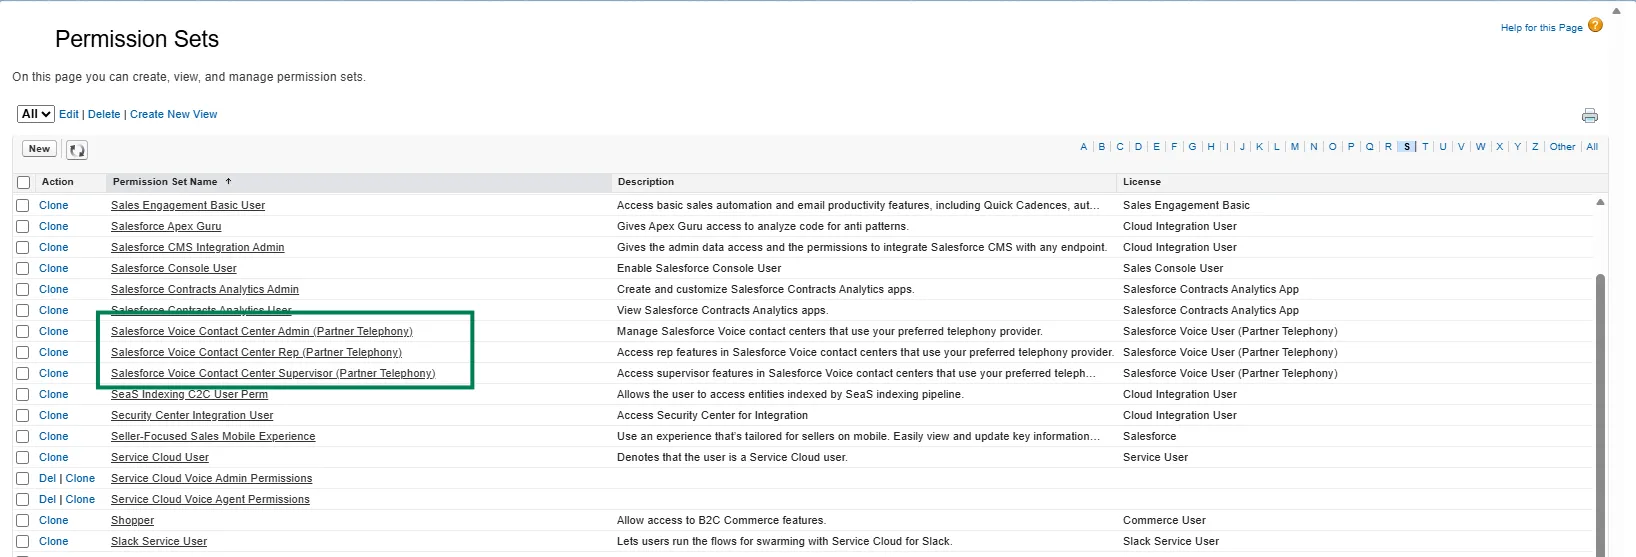
- Assigning the Salesforce Voice permission sets should automatically assign a Salesforce Voice license to the associated users.
2. Omni-Channel & routing configuration
With your core telephony features enabled, you must configure the workspace where your sales and service representatives will handle live calls.
Enable Enhanced Omni-Channel
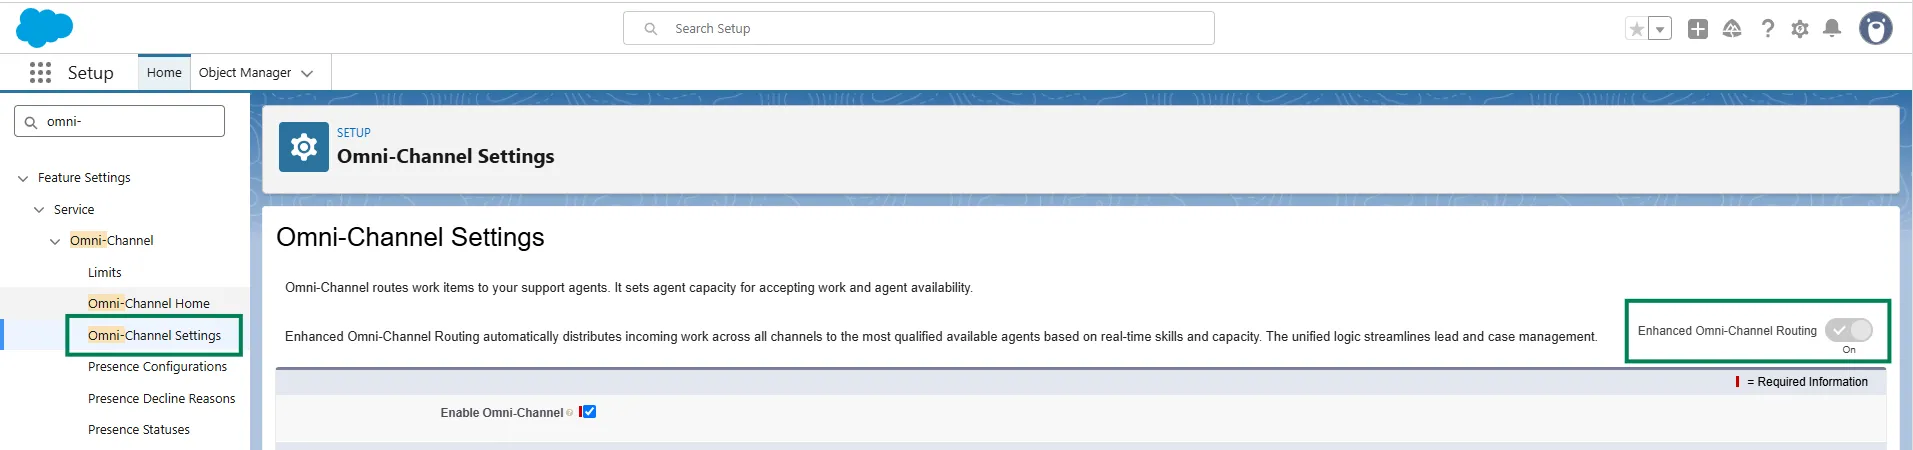
- In Setup, use the search box to find Omni-Channel Settings.
- Toggle on Enhanced Omni-Channel Routing.
Add Omni Channel and Object-Linking Notifications to the Utility Items
- Navigate to Setup > Apps > Apps Manager.
- Open the Lightning page where you would like to embed the Omni client.
- In the Utility Items tab, click Add Utility Item and select the Omni-Channel and the Object-Linking Notifications.
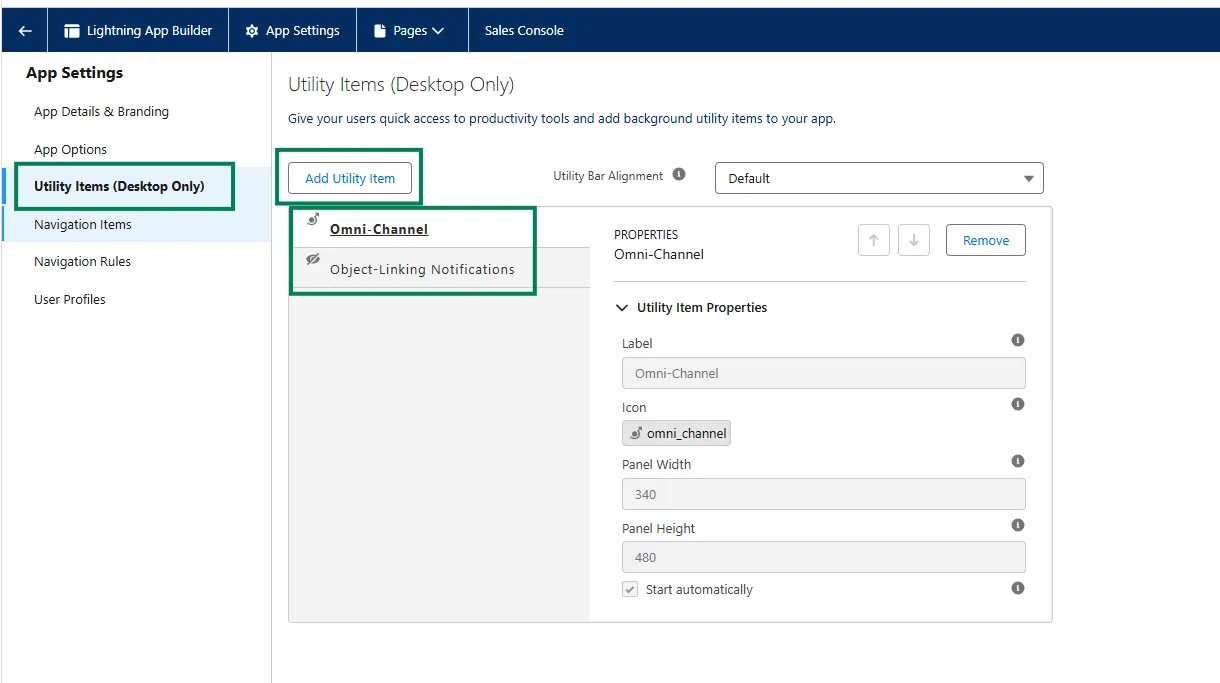
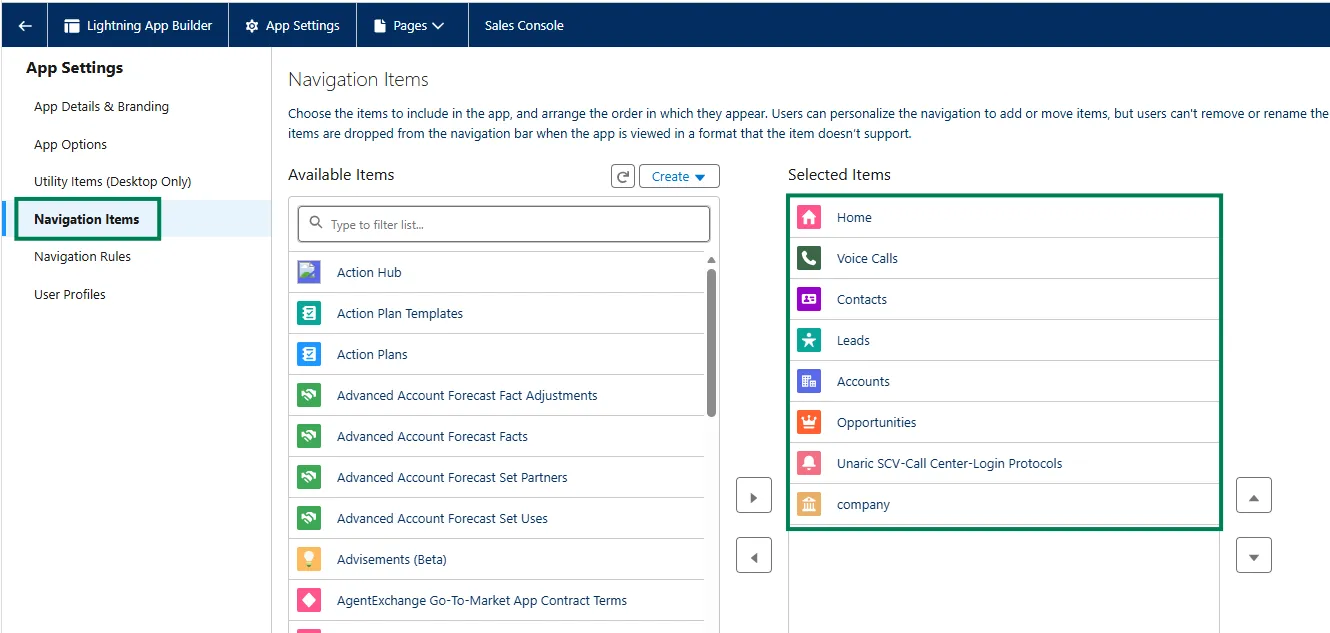
- In the Navigation items tab, configure required objects, such as Voice Calls.
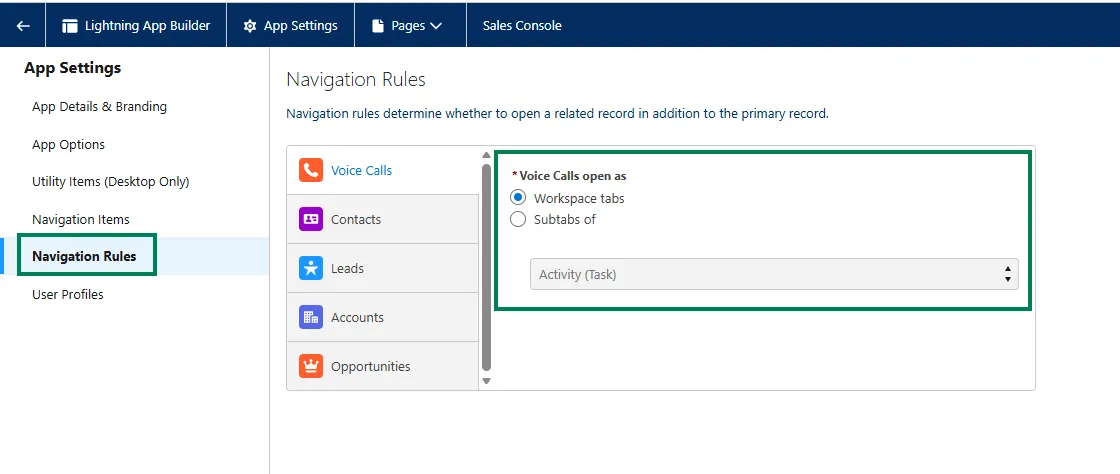
- In the Navigation Rules tab, select whether related records should open as workspace tabs or subtabs.
Create Presence Statuses
- In Setup, use the search box to open the Presence Statuses page.
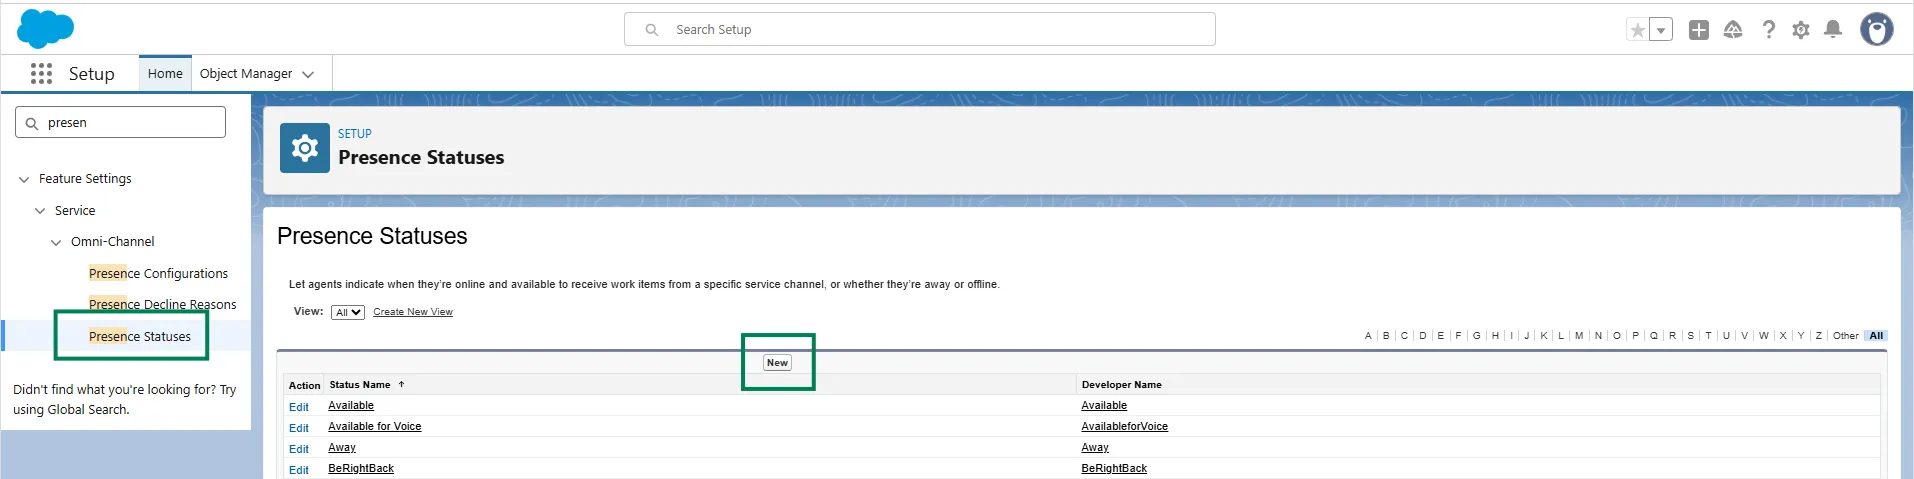
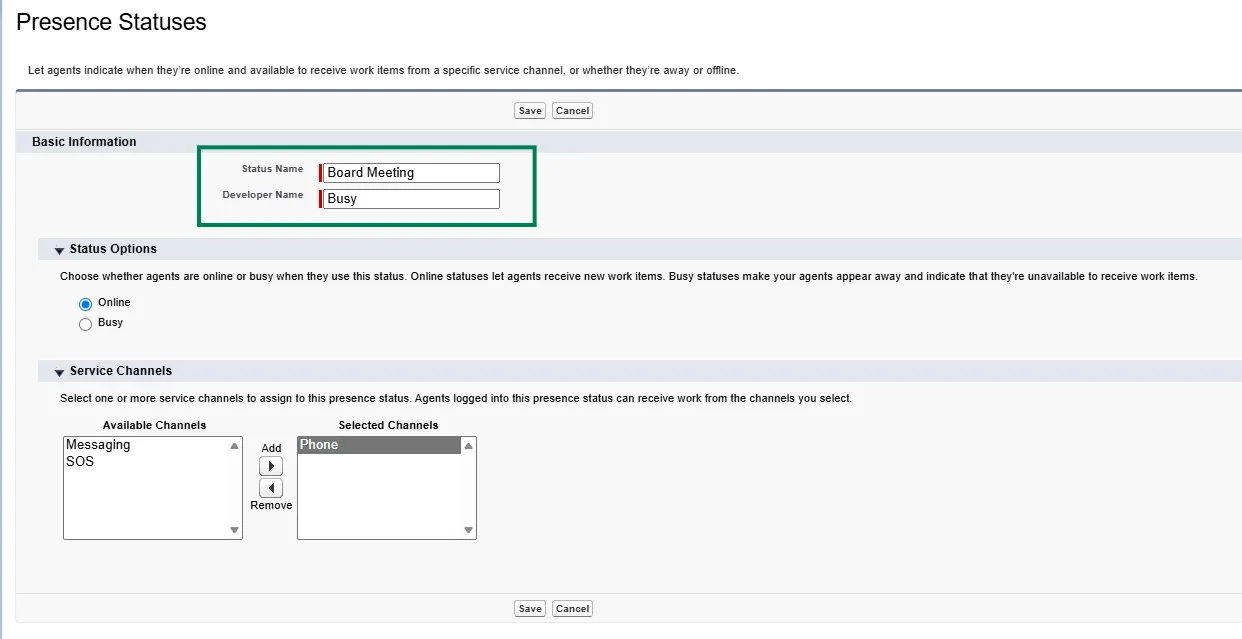
- Here you can edit and create presence statuses as per your requirements. For example:
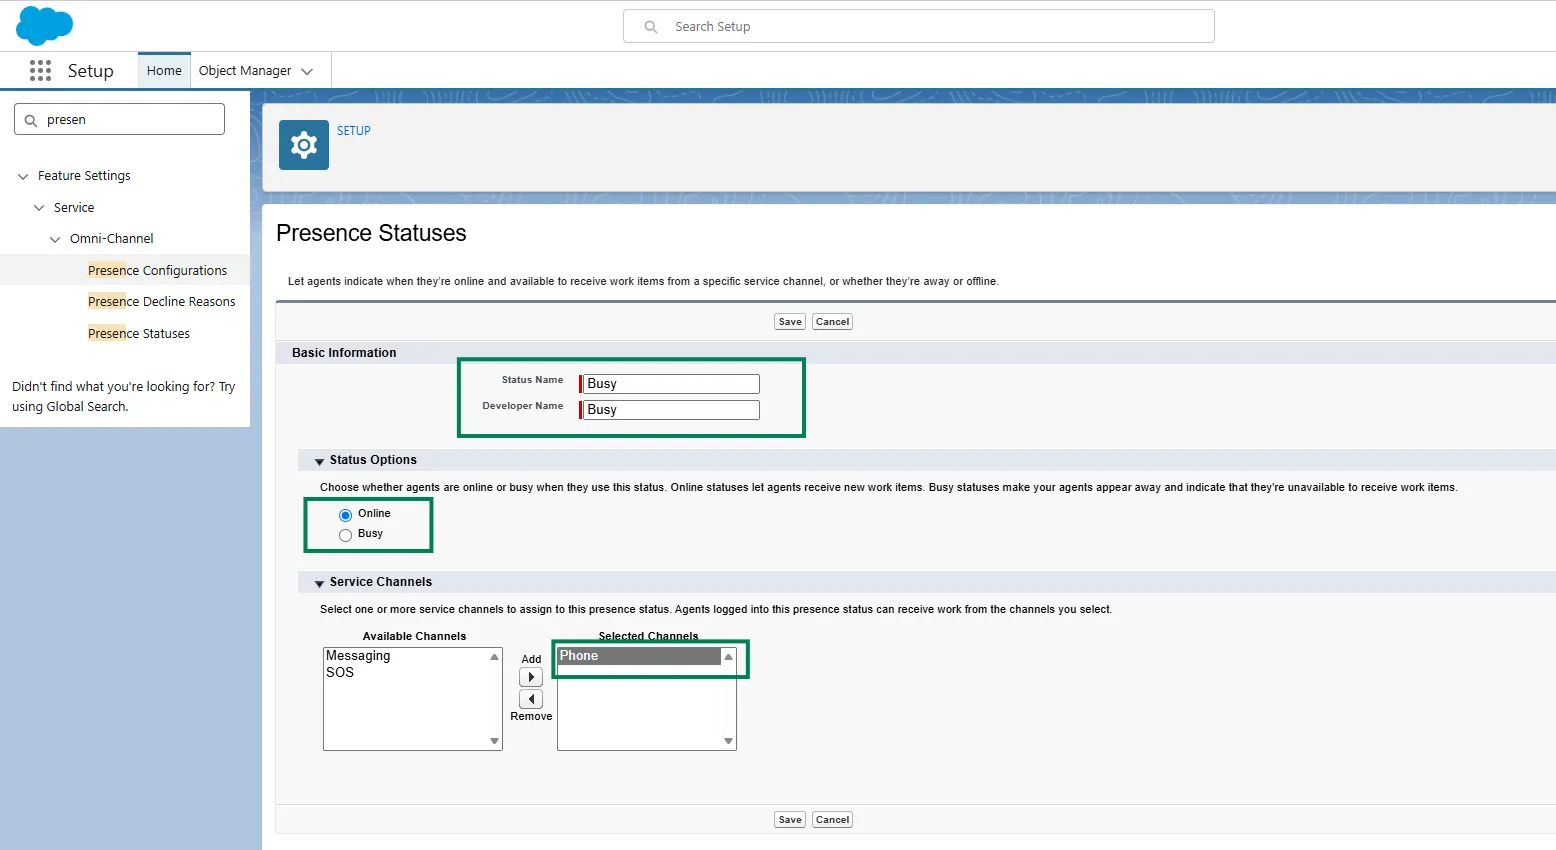
The Status Name (which will show in the Omni client) can be anything (such as Board Meeting or On Vacation), however, to sync this with Microsoft Teams, the Developer Name must match a correct Teams presence status (for example, Away or Busy). You cannot have conflicting developer names A developer name of Away can only be set against a single Status Name.
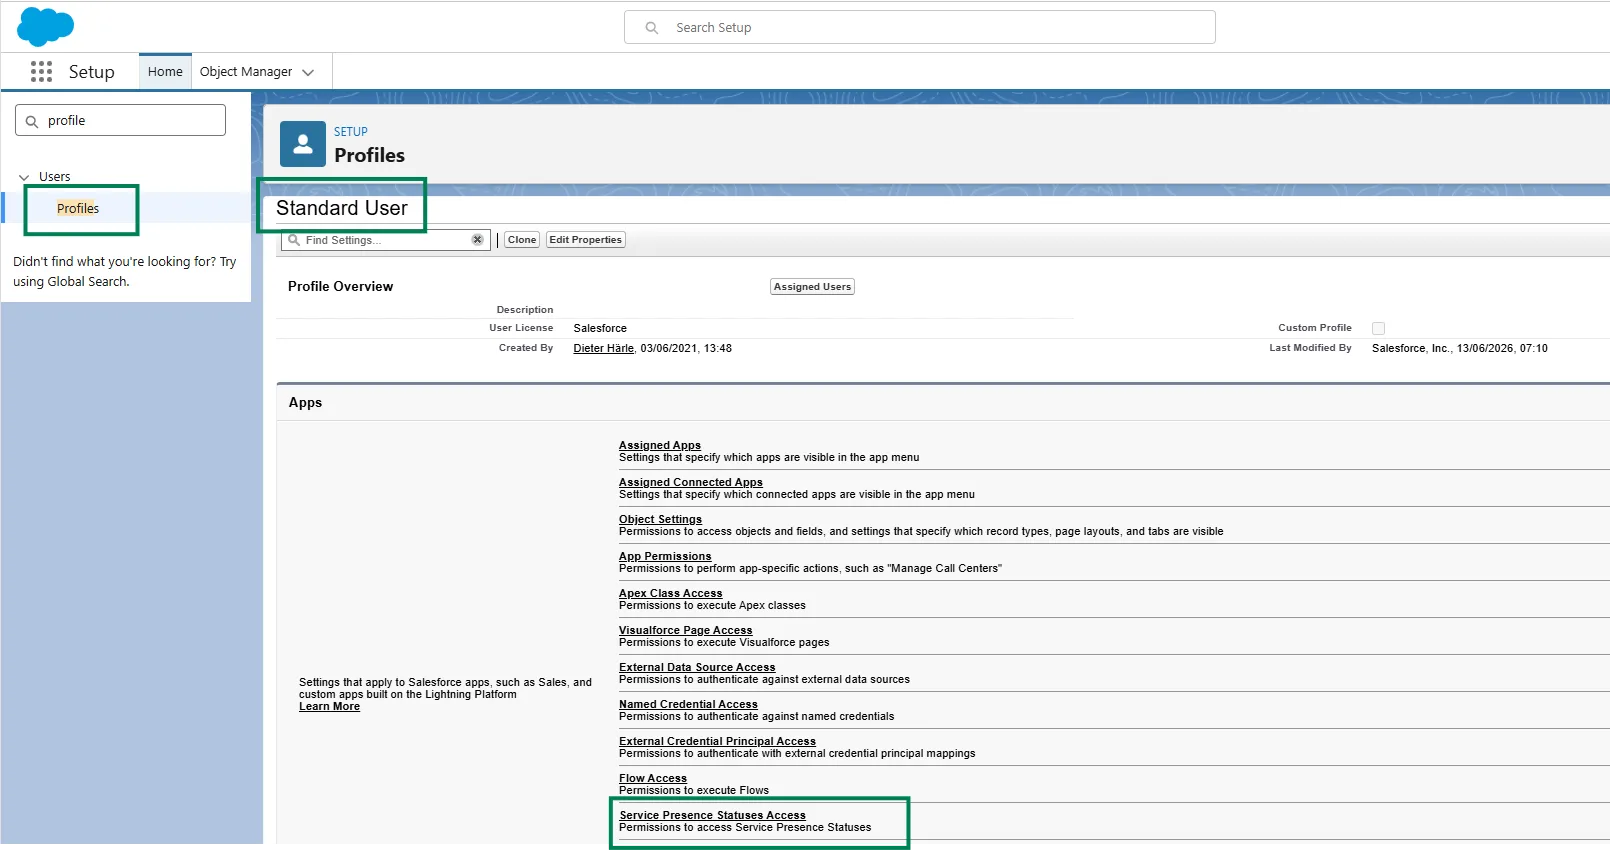
- To allow the use of presence statuses, navigate to Setup > Users > Profiles.
- Select the required profile (for example, Standard User) and choose Service Presence Statuses Access under Apps (if Enhanced Profile User Interface enabled) or Enable Service Presence Status Access.
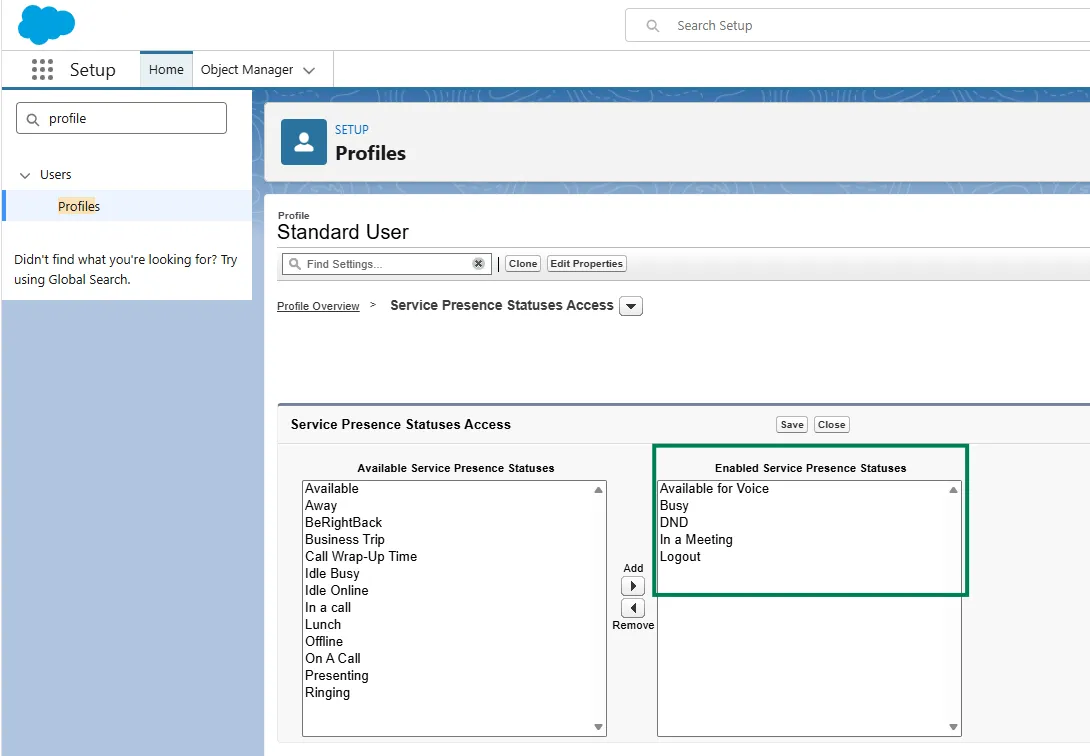
- Now you can move the Available presence statuses into the Enabled presences:
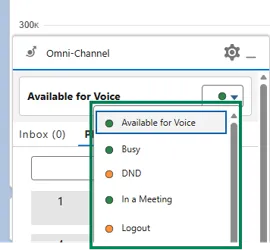
- Reload browser tab to make Omni-Channel reflect new presence states.
Presence configuration
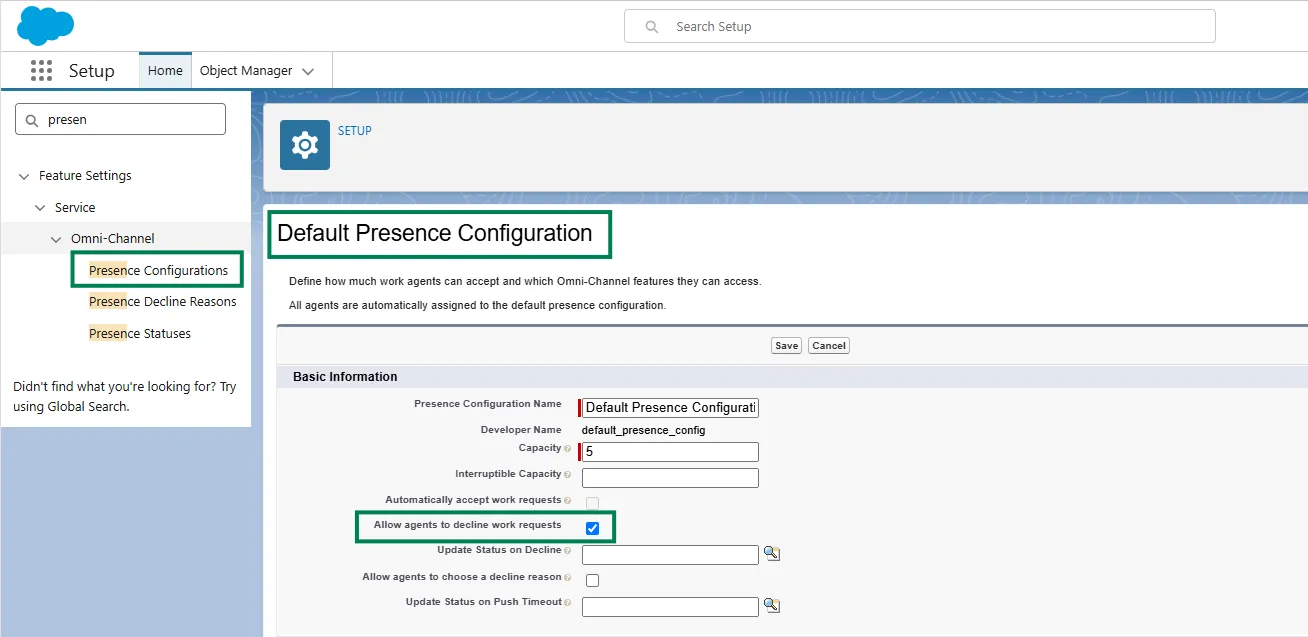
- In Setup, use the search box to find and open Presence Configurations.
- Open the Default Presence Configuration and enable Allow agents to decline work requests. This allows agents decline calls in the Omni Channel.
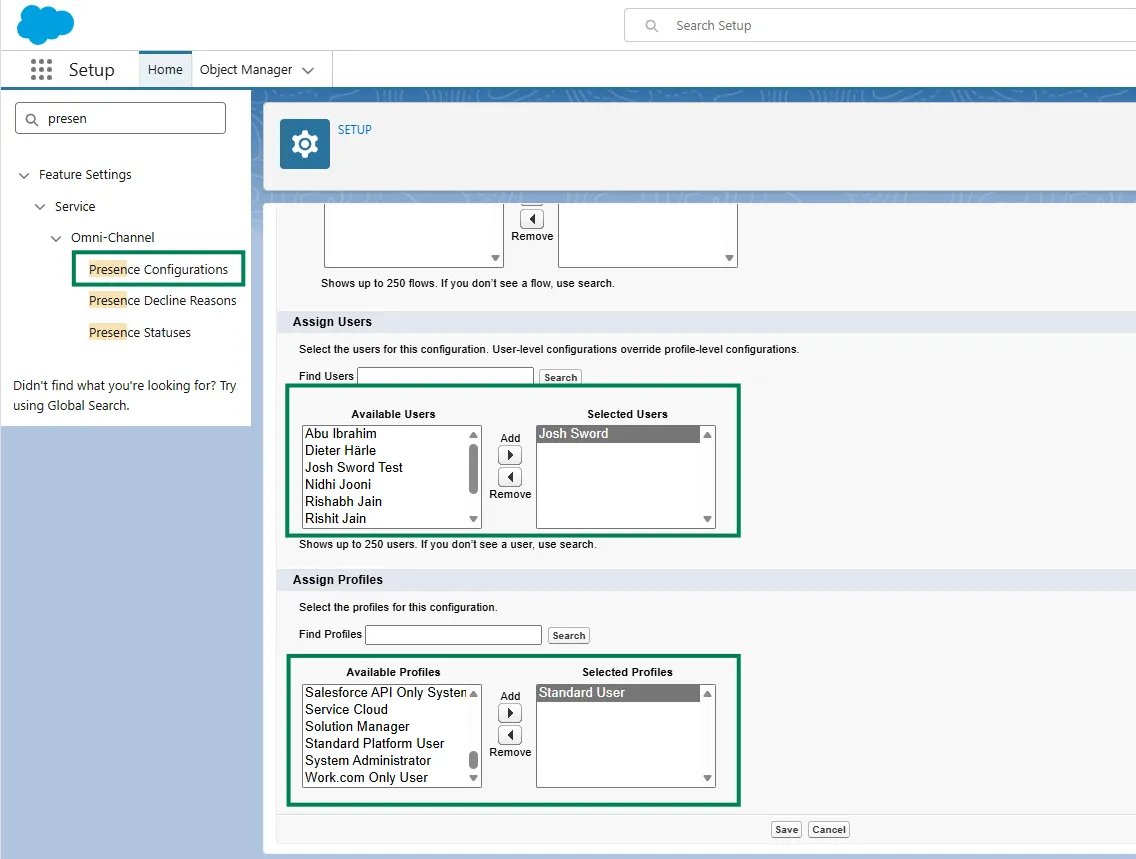
- If you only have the Default Presence Configuration, it will be assigned to all users. If there are multiple, you will need to assign the presence configuration to the users or profiles as shown below.
3. Unaric package installation & Contact Center setup
Once Salesforce is configured for Omni-Channel routing, you will install the technical components that connect to Microsoft Teams.
Install Unaric Voice for Teams Managed Package
Install the latest package version provided by Unaric.
Assign permissions
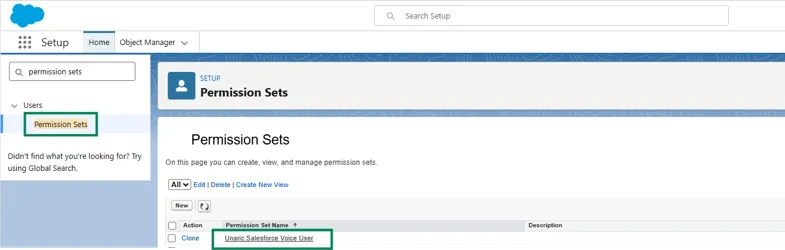
- Navigate to Setup > Users > Permission Sets.
- Open the Unaric Salesforce Voice User permission set.
- Click the Manage Assignments button.
- Click the Add Assignment button and use the checkboxes to select users to assign.
- Click Next.
- Optionally, you can specify an expiration date for the permissions.
- Click Assign to finish.
Import Contact Center
- In Setup, use the search box to find and open Partner Telephony Contact Centers.
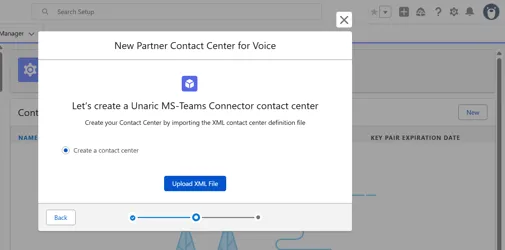
- Click New to import the adapter XML file provided by Unaric.

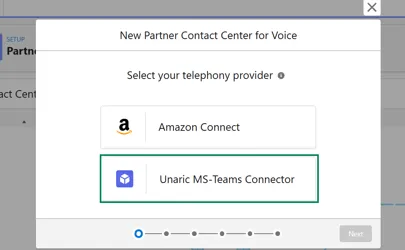
- Select Unaric MS-Teams Connector under Telephony Provider.
- Import the adapter XML file provided by Unaric.
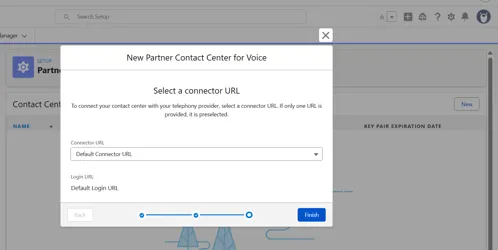
- Under Connector URL, select Default Connector URL.
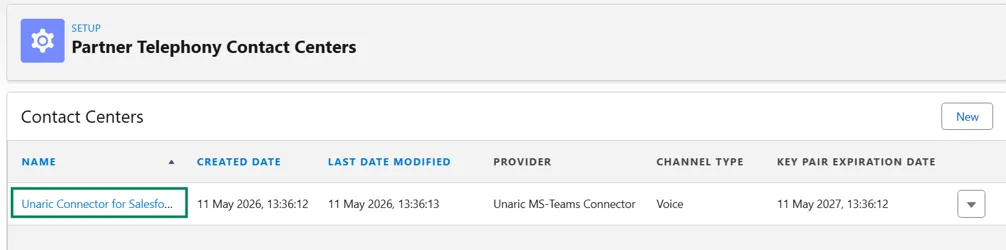
- Click the name of the Contact Center to open it.
- To add the Contact Center users, click Add.If you do not see the required Salesforce user listed, verify that they have the Unaric Salesforce Voice User permission set assigned, as well as a Salesforce Voice license.
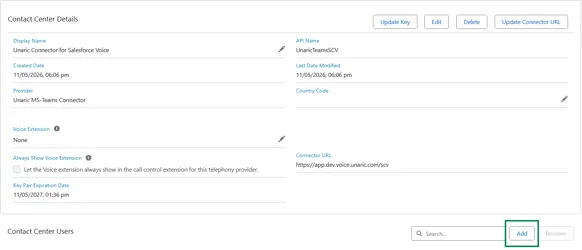
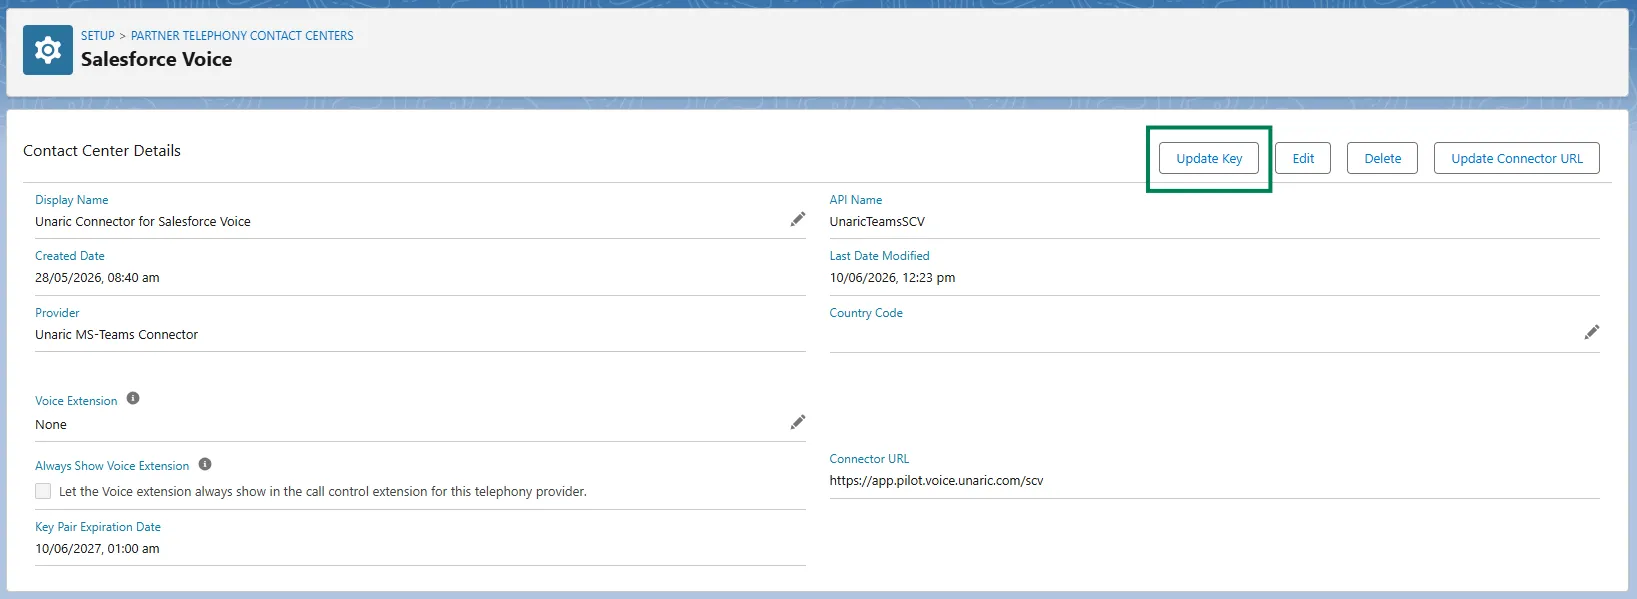
- In the Contact Center, click Update Key to fetch and set the certificate.
Session settings
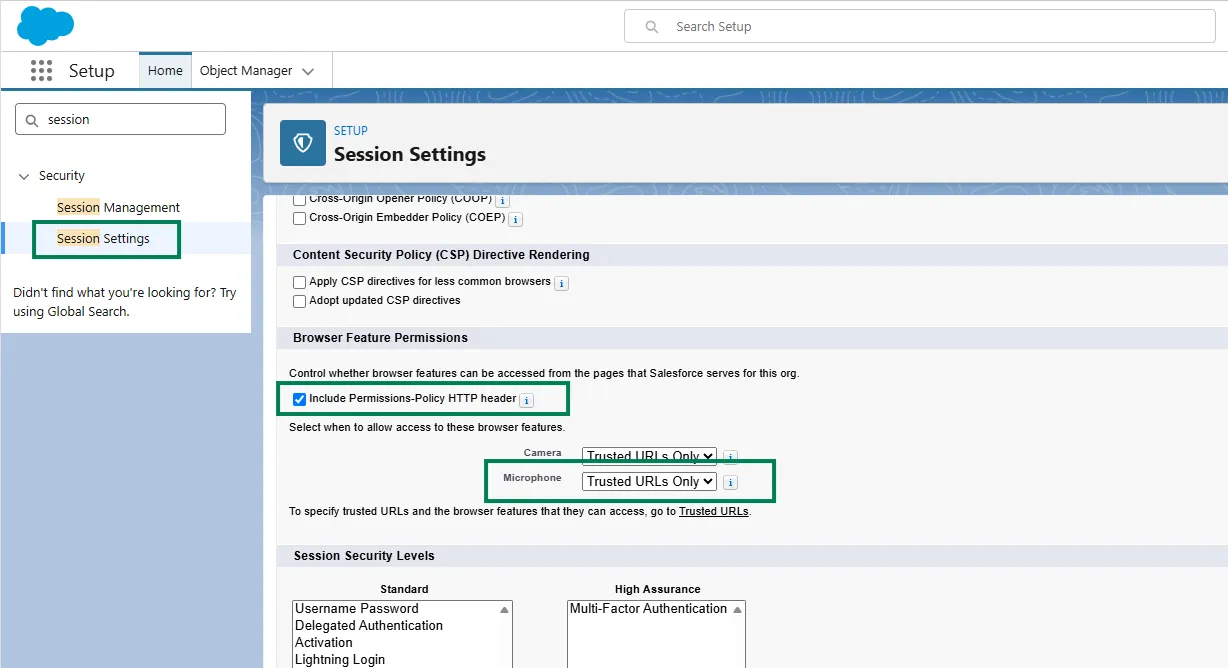
- Navigate to Setup > Security > Session Settings.
- Under Browser Feature Permissions, enable Include Permissions-Policy HTTP header.
- Below, set Microphone as Trusted URLs Only.
Add Trusted URL
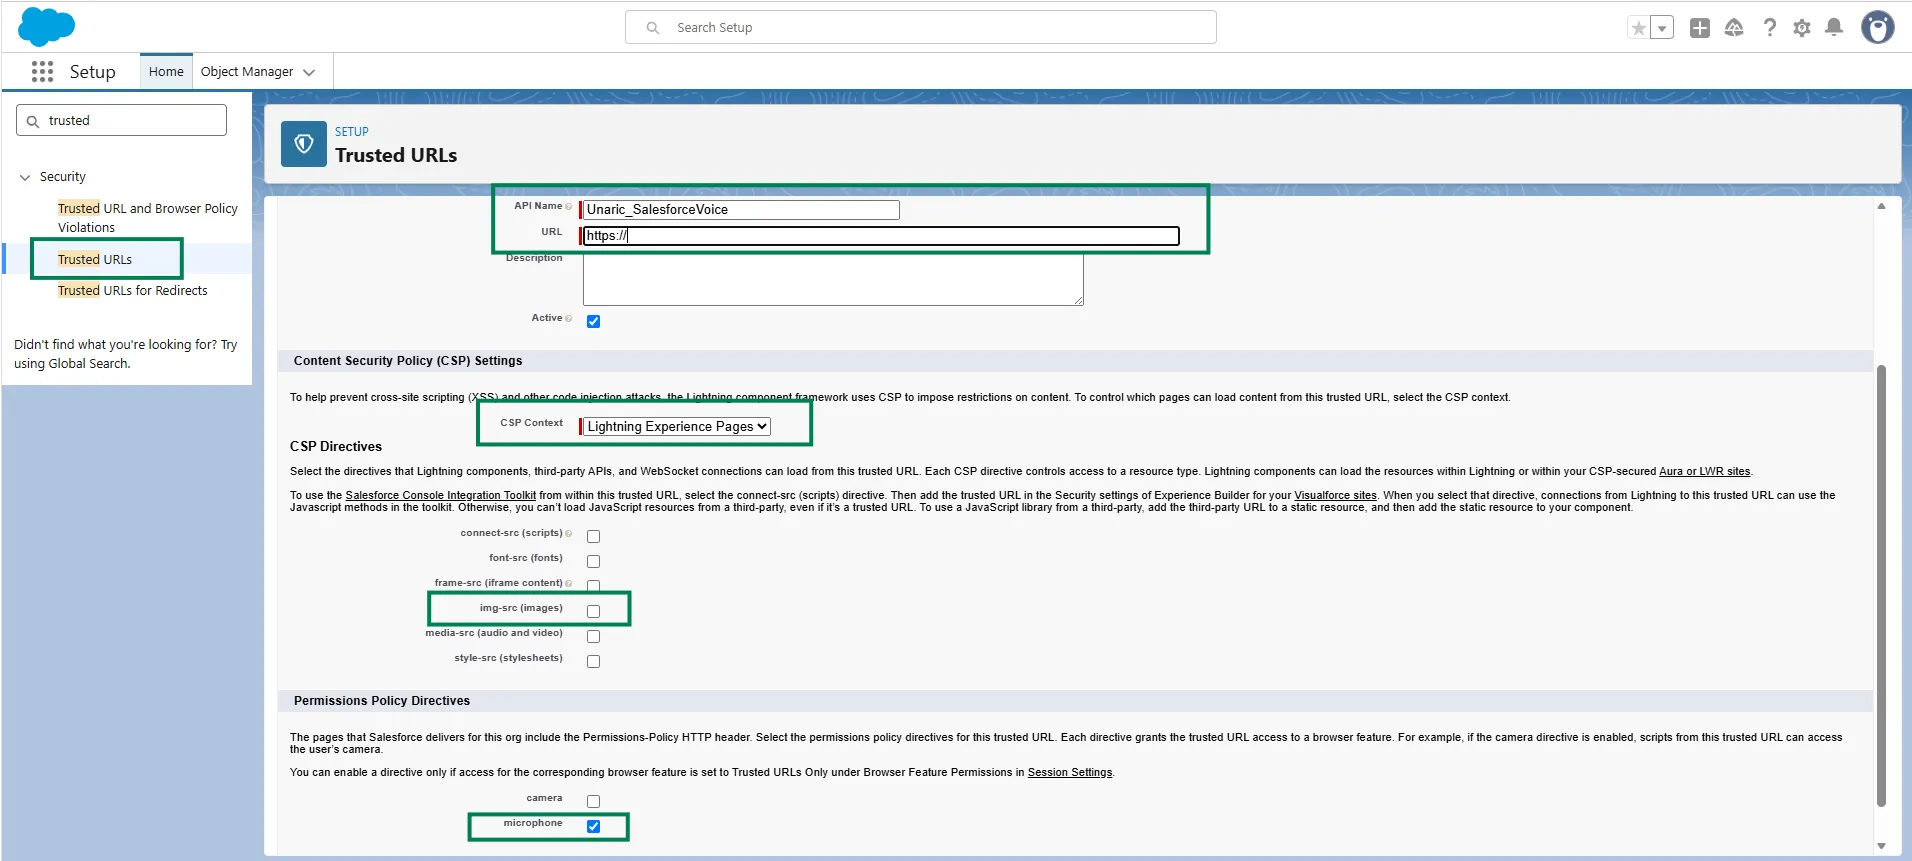
- Navigate to Setup > Security > Trusted URLs.
- Click New Trusted URL.
- Enter the API Name and URL (URL provided by Unaric).
- Set the CSP Context to Lightning Experience Pages.
- Under CSP Directives, disable the img-src (images) check box, and under Permission Policy Directives, enable microphone.
4. Agent onboarding
To access Unaric Voice for Teams, agents must authenticate the Omni-Channel client using their Microsoft 365 credentials and grant local media permissions.
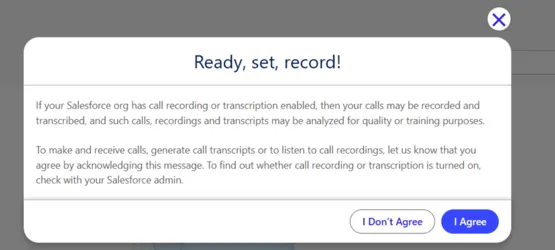
- When opening the Omni-Channel for the first time, you will encounter notice from Salesforce. Click I Agree to continue.
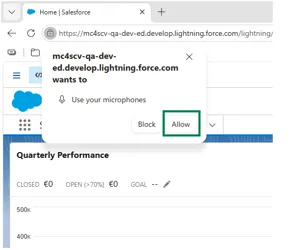
- When prompted by the browser, allow the use of your microphone.
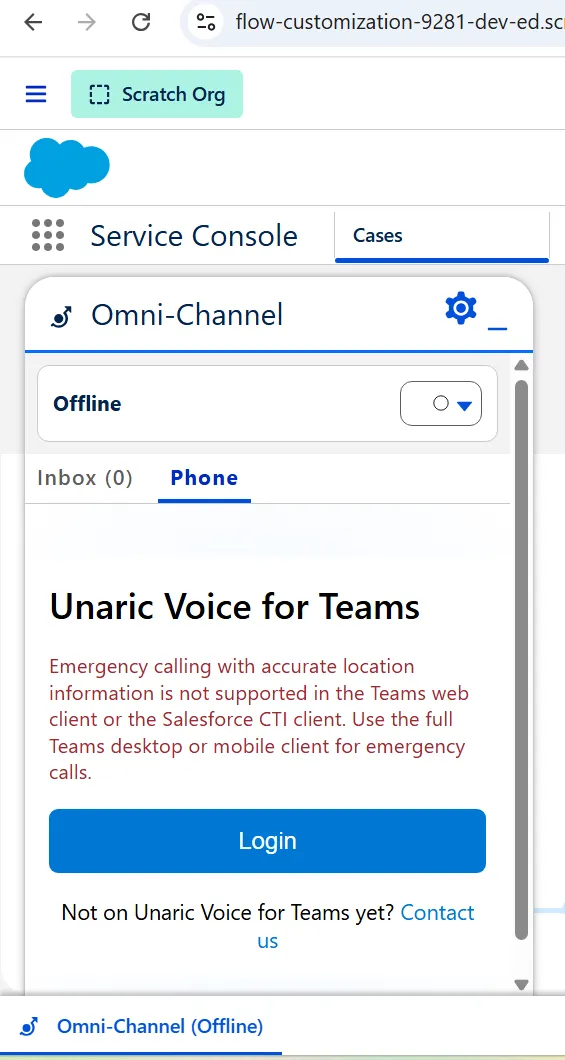
- You will see the Unaric Voice for Teams login screen in the Omni-Channel client. Click Login and authenticate with your Microsoft Teams credentials.
5. Customize layouts
Lastly, you need to customize the Voice Call object layout, embed the Conversations component, and expose related lists on the Account, Contact, and Lead layouts.
Voice Call Lightning record page
In Salesforce Voice, calls are logged as Voice Calls, which is are standard Salesforce objects. To add components to the Voice Call record page:
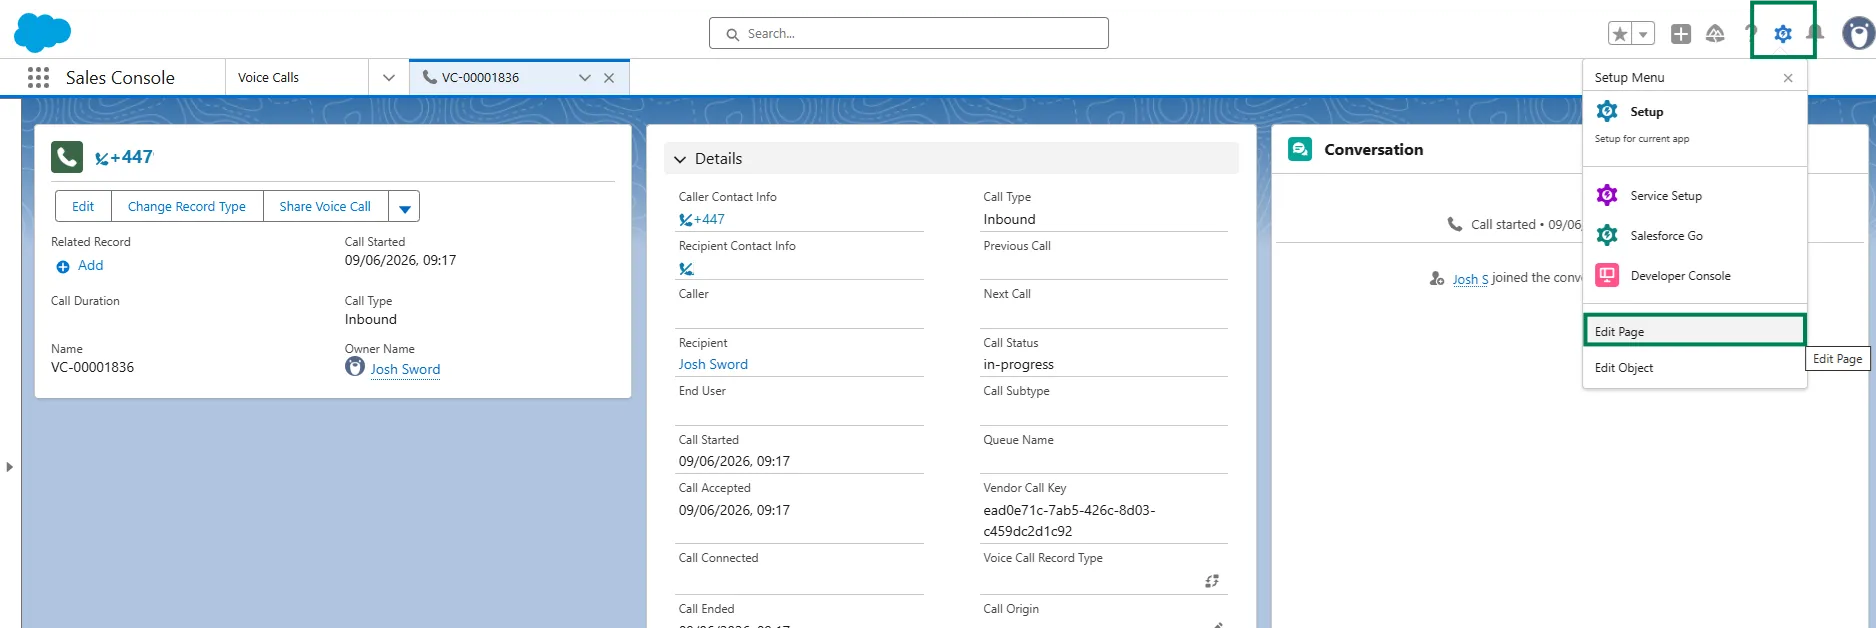
- Open a Voice Call record.
- Click on Settings ( icon) in the top-right corner, and select Edit Page.
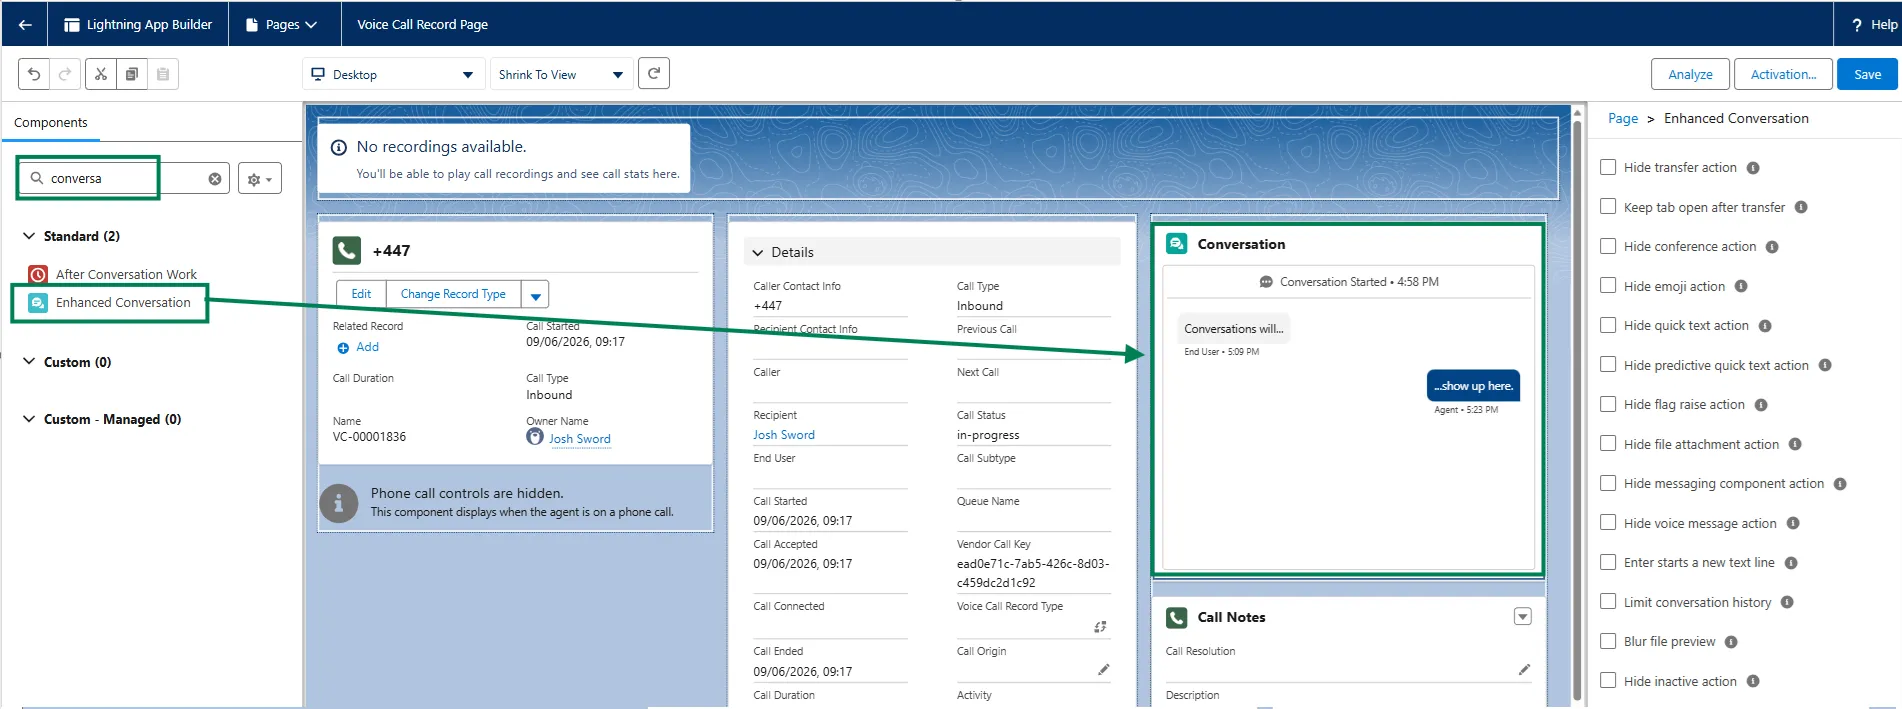
- Here you can add components to the Voice Call record page, such as Conversations.
Voice Call page layout
- Navigate to Setup > Objects and Fields > Object Manager.
- Open the Voice Call object.
- In the Page Layouts tab, open your chosen layout for this setup or create a new one.
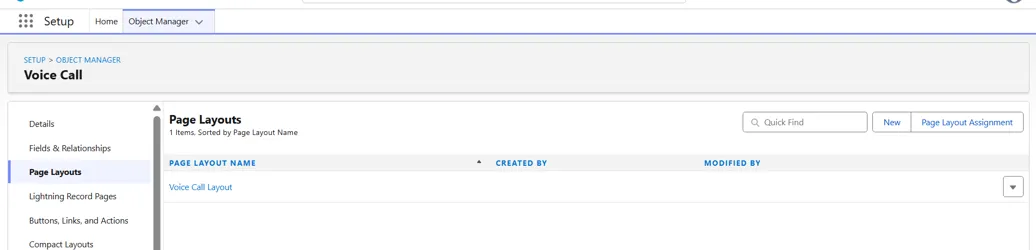
- Add any required fields on the page layout and assign it to required profiles.
Add Voice Call related lists
- Navigate to Setup > Objects and Fields > Object Manager.
- Select the required objects. For example, Contact or Account.
- In the Page Layouts tab, open your chosen layout for this setup or create a new one.
- Under Related Lists, drag Voice Call onto the layout and save it. Repeat for any other required objects (for example, Lead or Account).
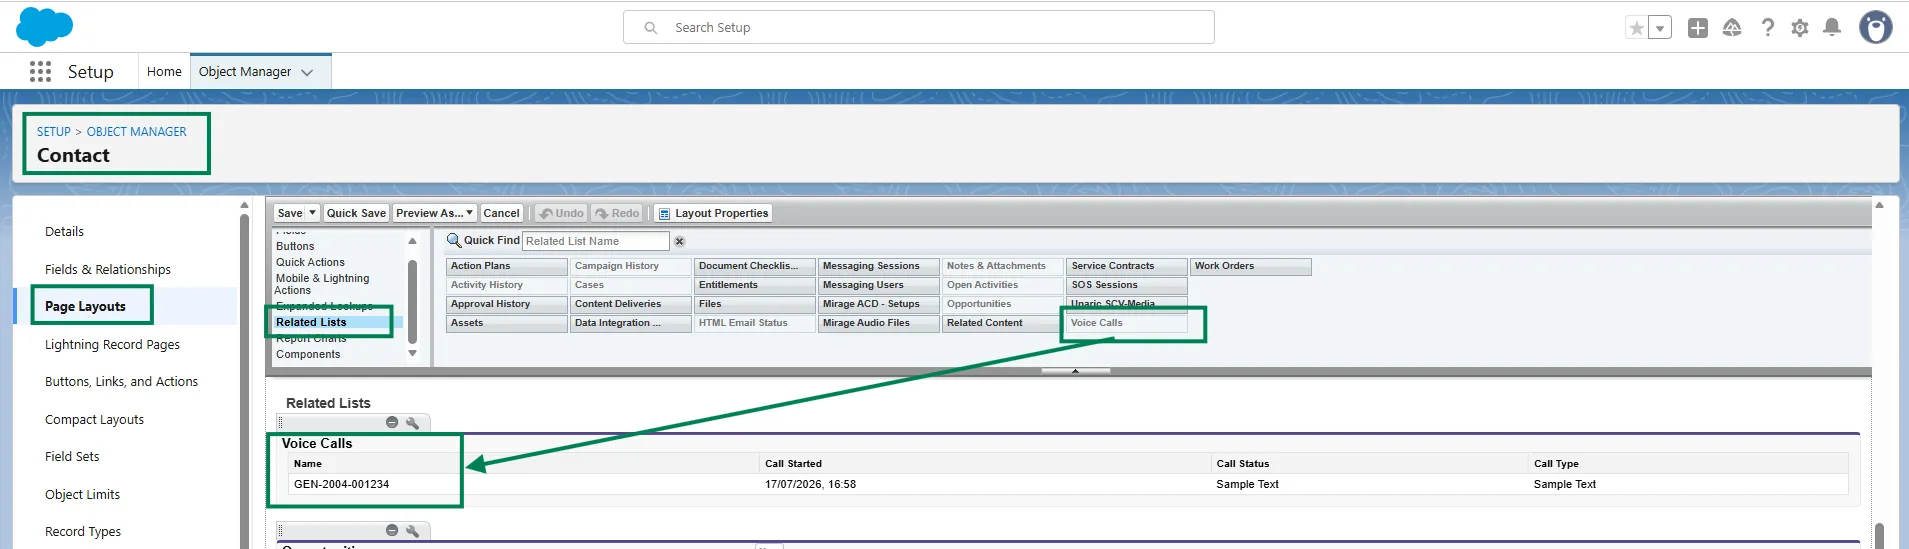
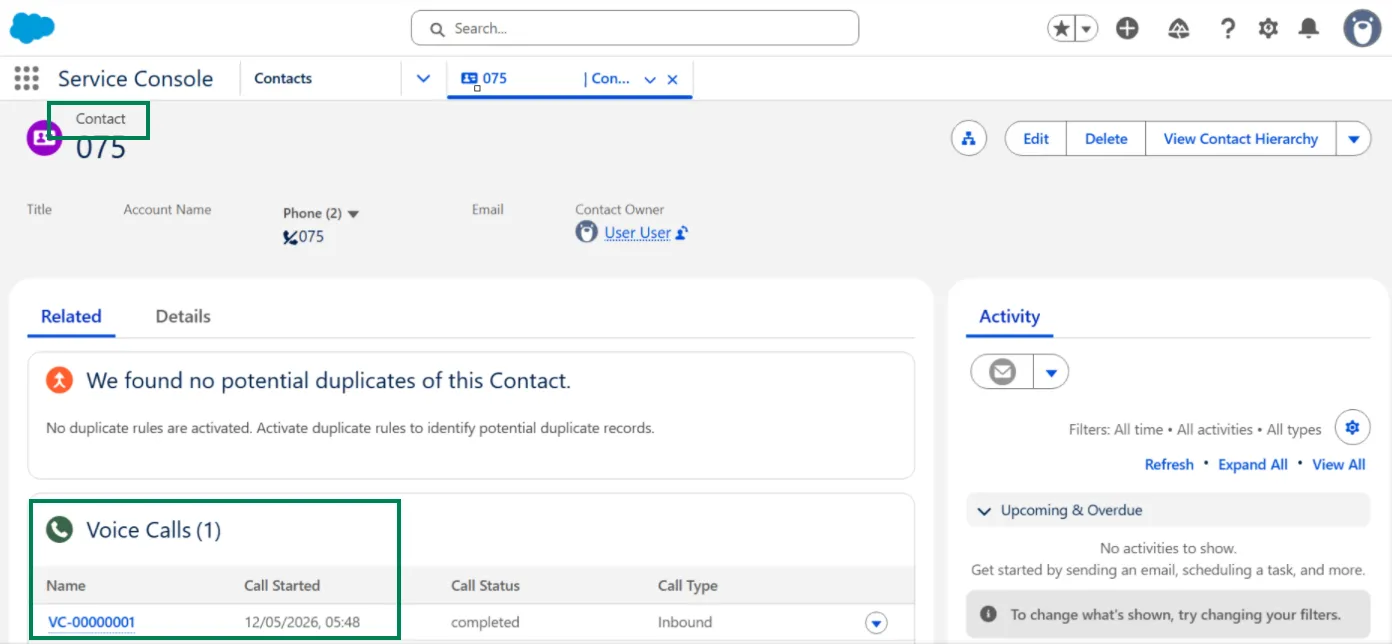
Once added, the lists will appear on associated Voice Call records against the related Account, Contact, or Lead.