Recurring Journeys With Scheduled Selections
This page offers a practical, step-by-step guide to automating recurring marketing campaigns and repeating tasks in SFMC by connecting scheduled Unaric Segment Selections to Journey Builder.
1. Create the Target Data Extension
When defining the Selection in Unaric Segment, you have to consider if contacts are going to enter once or if they can enter multiple times to your new journey.
Are Subscribers supposed to enter one single time into the journey?
For example, in an onboarding campaign, you just want to welcome our users once, so they should only pass through the journey once. In this scenario, you're going to configure the Target Data Extension with the usual primary key we have configured in SFMC (the Subscriber Key) and all the fields that we may need during the journey (email, mobile, personalization fields, or fields that we are going to need for Decision Splits).
Are subscribers supposed to enter multiple times on this journey?
For example, if you want to congratulate our heavy users at the beginning of each month, we want the clients to re-enter the journey every month they fulfill this Selection. In this scenario, you need to configure an extra primary key field in our Target Data Extension, adding to the usual one a custom field with a flag that identifies each run.
For example, in this case, you can use the date when the selection runs to keep track of clients that entered multiple times.
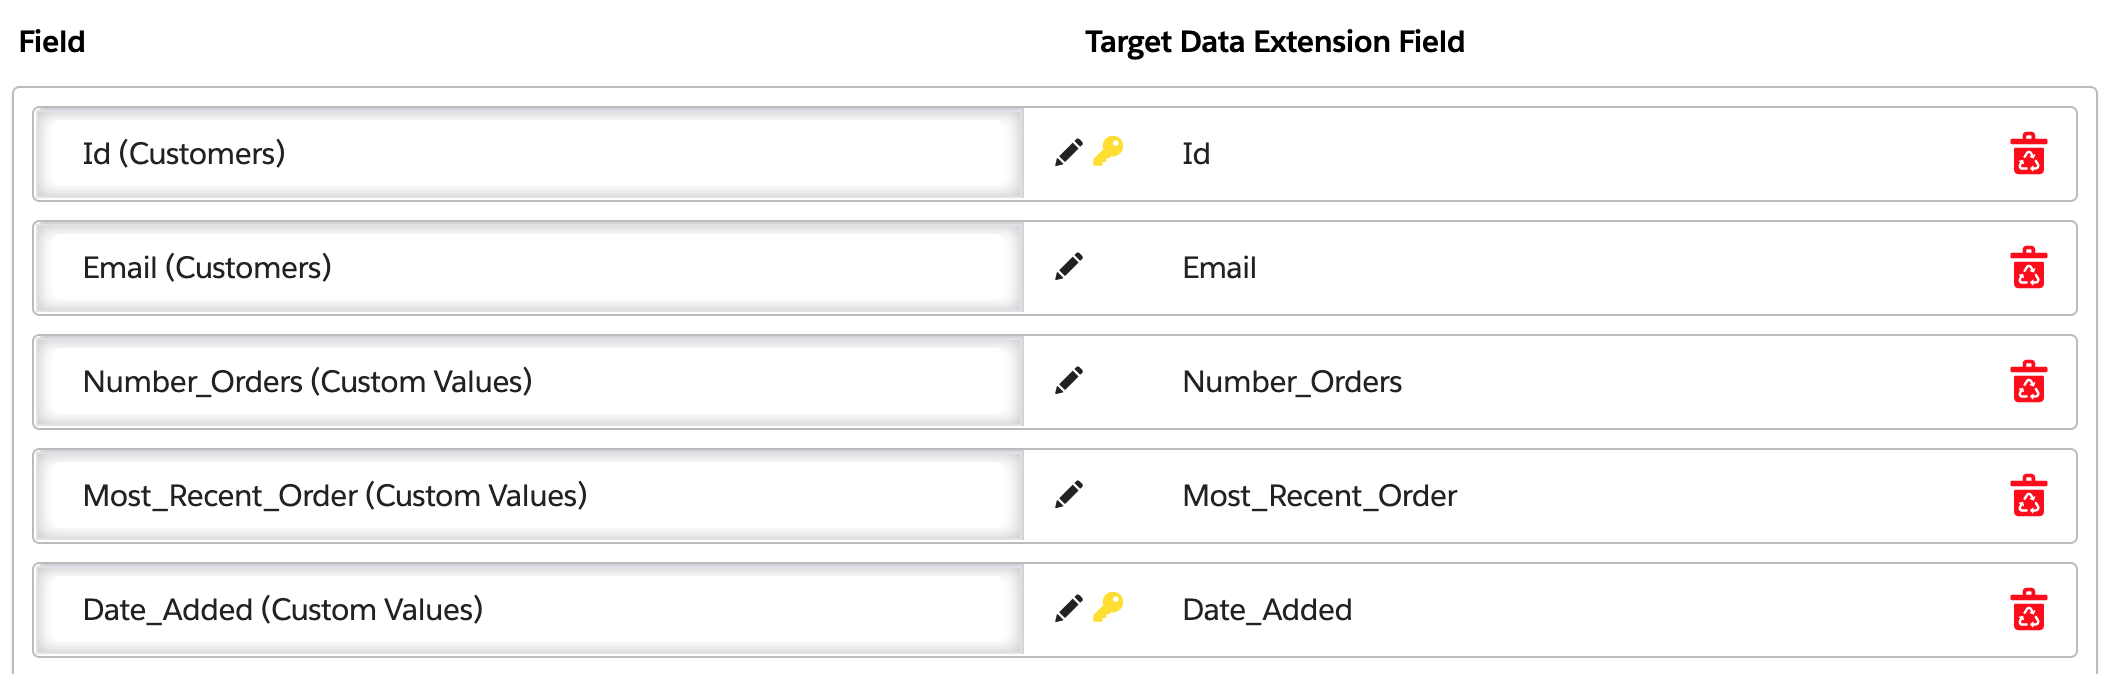
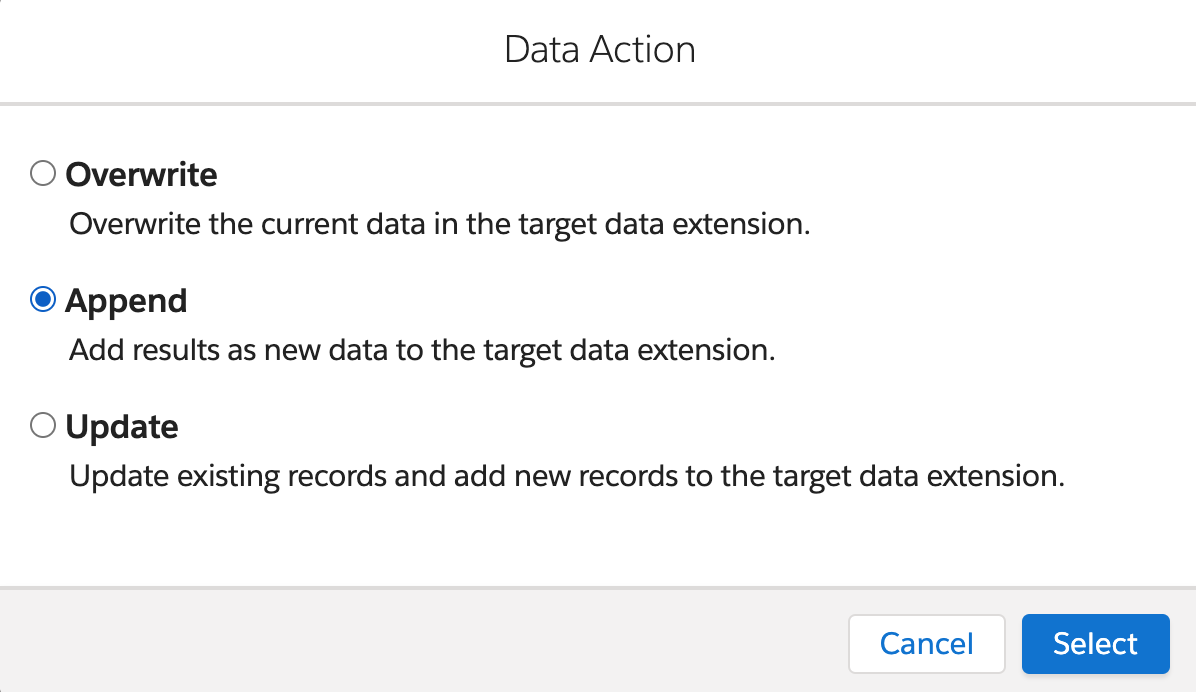
When creating the Selection, we recommend setting Data Action to Append or Update.
2. Use scheduled Selections
Once you have defined our Target Data Extension, schedule the Selection with the desired recurrence.
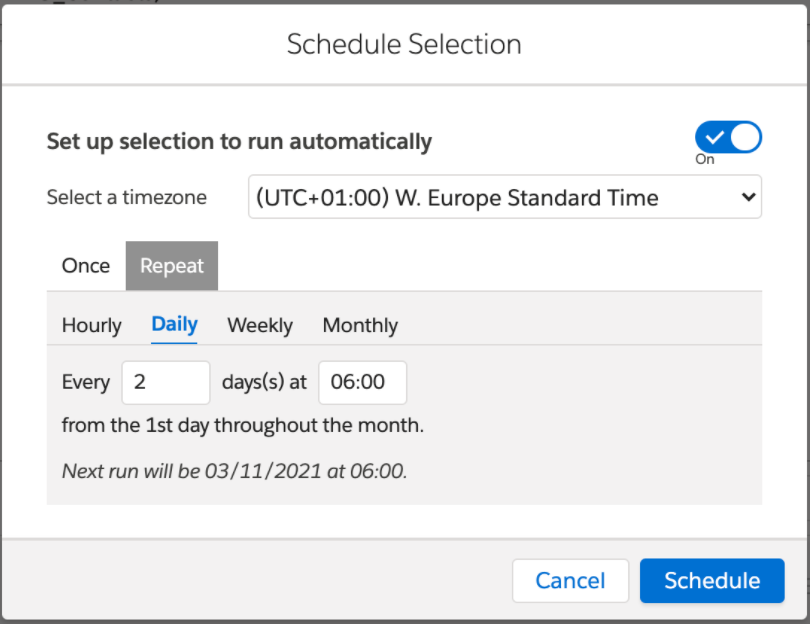
Once this is done you will have an automatically updated Data Extension saved on Salesforce Marketing Cloud, that you can use now to be the entry source of your journey.
For more information on setting up this feature, see Schedule Selections
2. Scheduled Selections for recurring journeys
Now you have an automated Data Extension, you can set it up as the entry source of your recurring journey, clicking in Schedule, after you have selected the Data Extension you just created as Entry Source
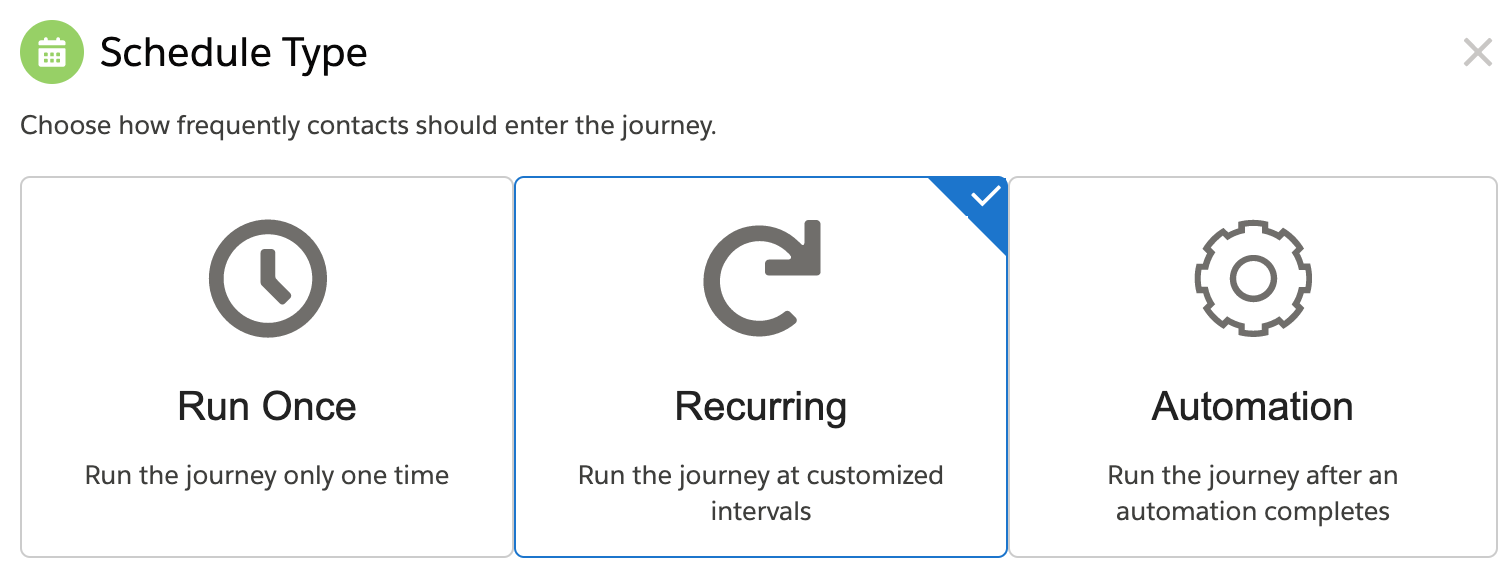
After you click on Select, you will see a screen where you can Set Schedule and you will get to the following screen:
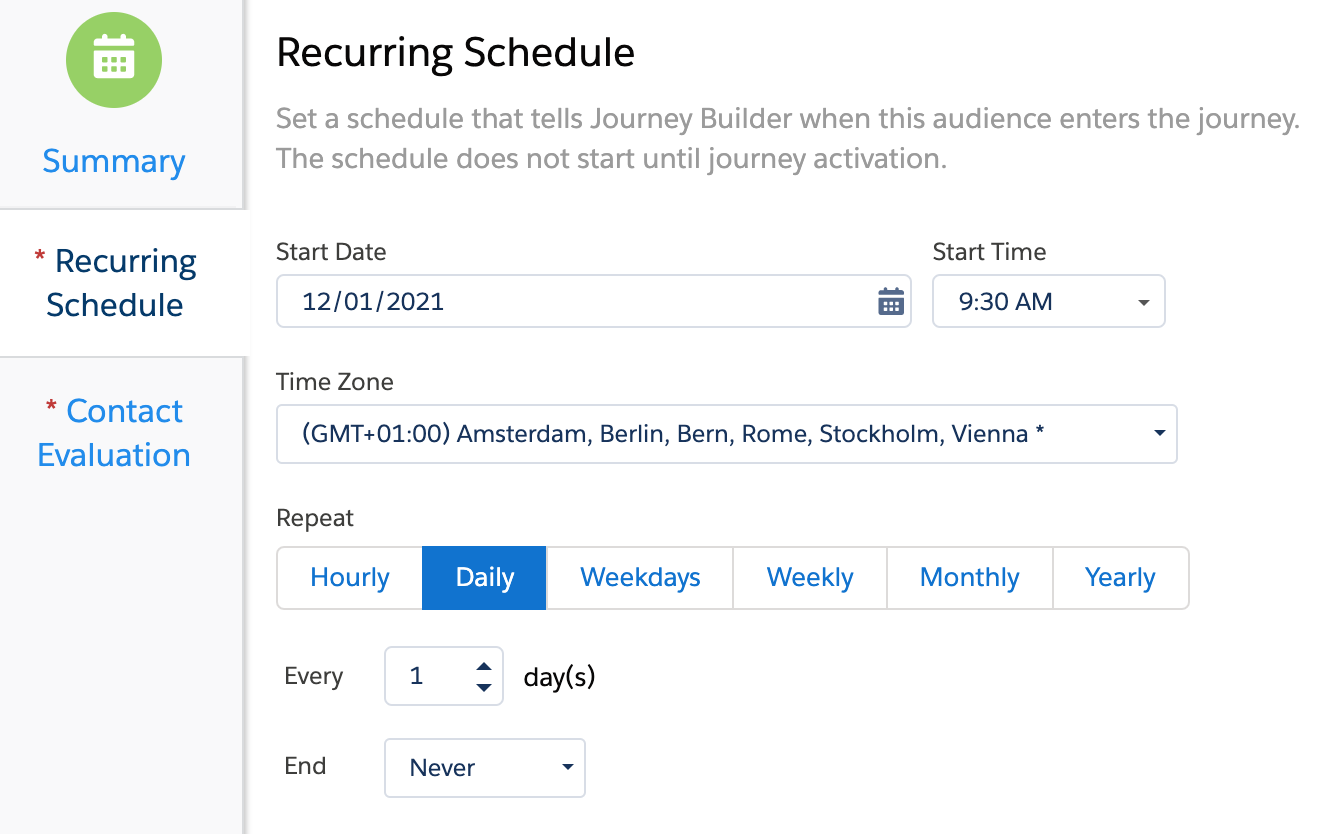
In the example above, your scheduled Data Extension should run daily before 9:30 AM (GMT+01:00).
Be careful to do it aligned with the scheduled Selection of your Data Extension, making sure that the scheduled Selection is always running before the Journey.
In the next tab, you will be able to configure which Contacts should enter the journey.
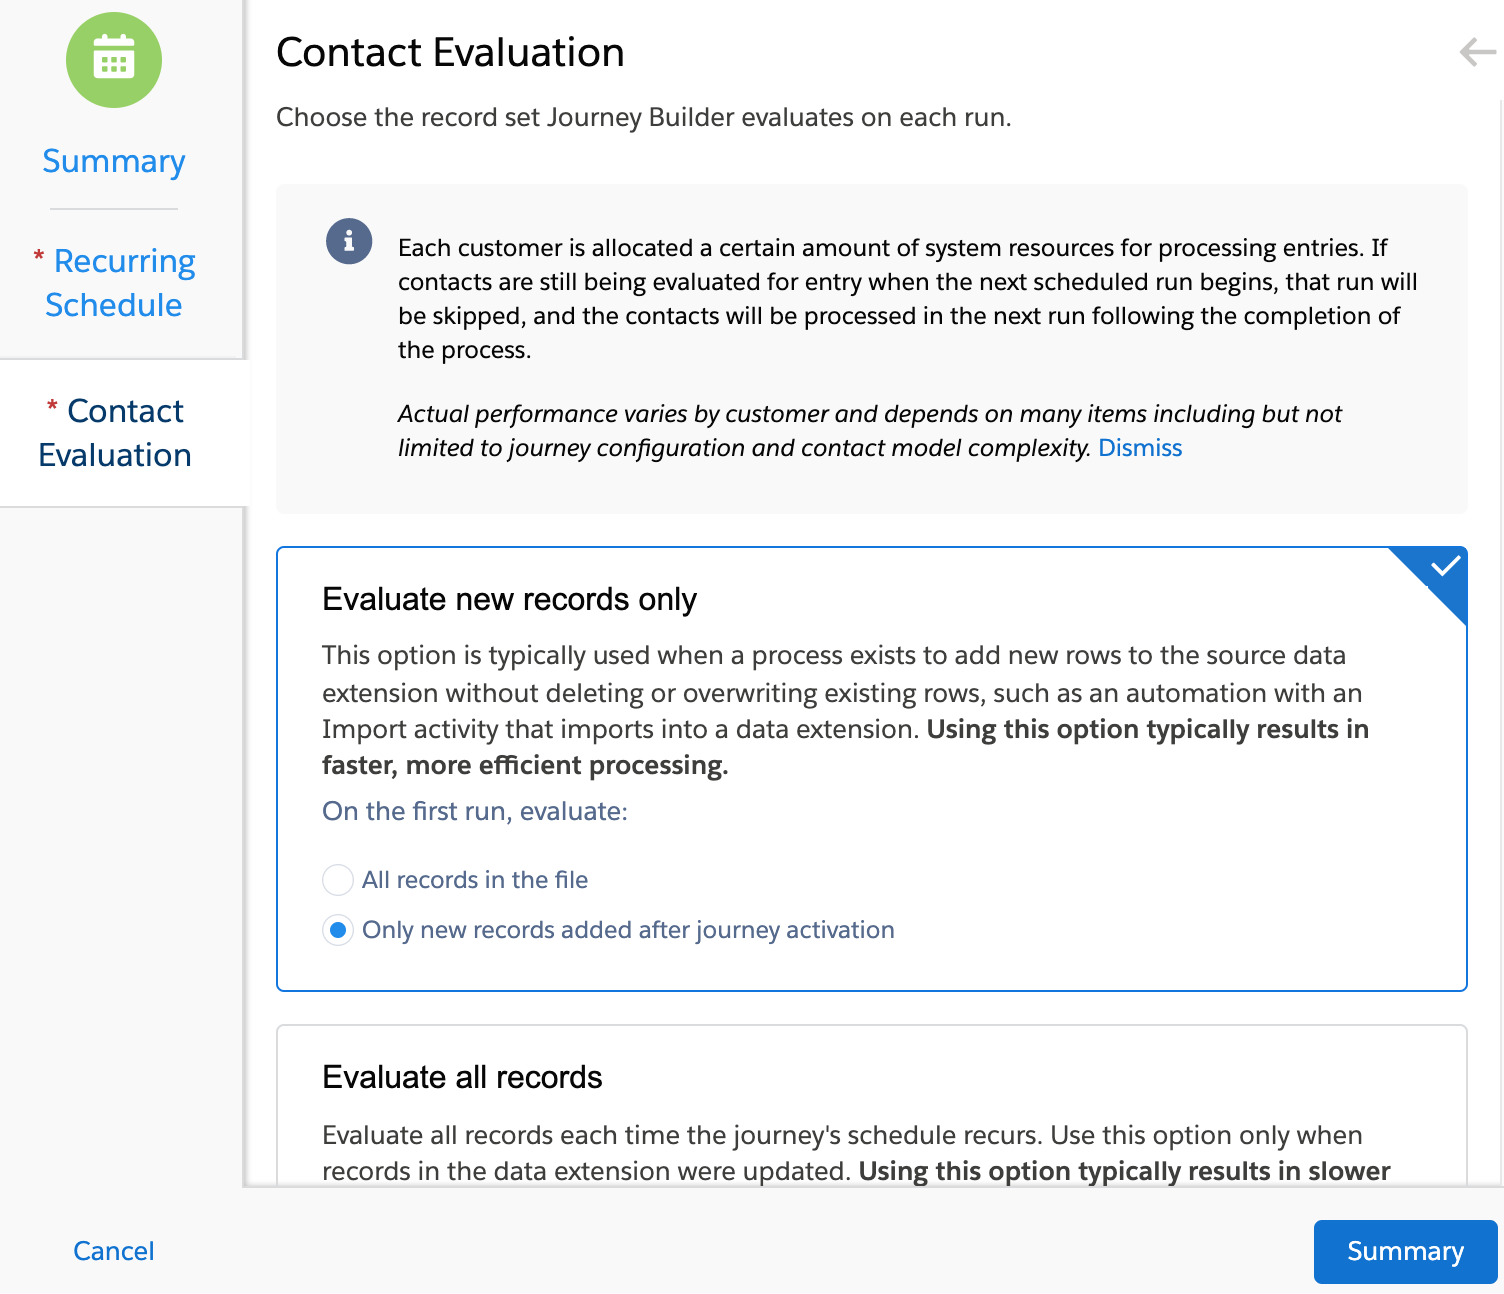
In the Contact Evaluation tab, always use the Evaluate new records only option, so you can avoid problems between the synchronization of the journey and the scheduled Selection. If for any reason the scheduled Selection fails, the journey won't send anything until the next run.
Once this is done, your journey is fully configured and tested, and can be activated.
Workaround in Automation Studio
If the execution of the Selection depends on another activity (such as an import or the execution of another query), you can use Automation Studio to configure the query generated by DESelect Segment when executing your Selection.
- Go to the Automation Studio.
- Open the Automation where you want to add the execution of the Selection or create a new one.
- Drag and drop a Query Activity in the step where you want to run your Selection.
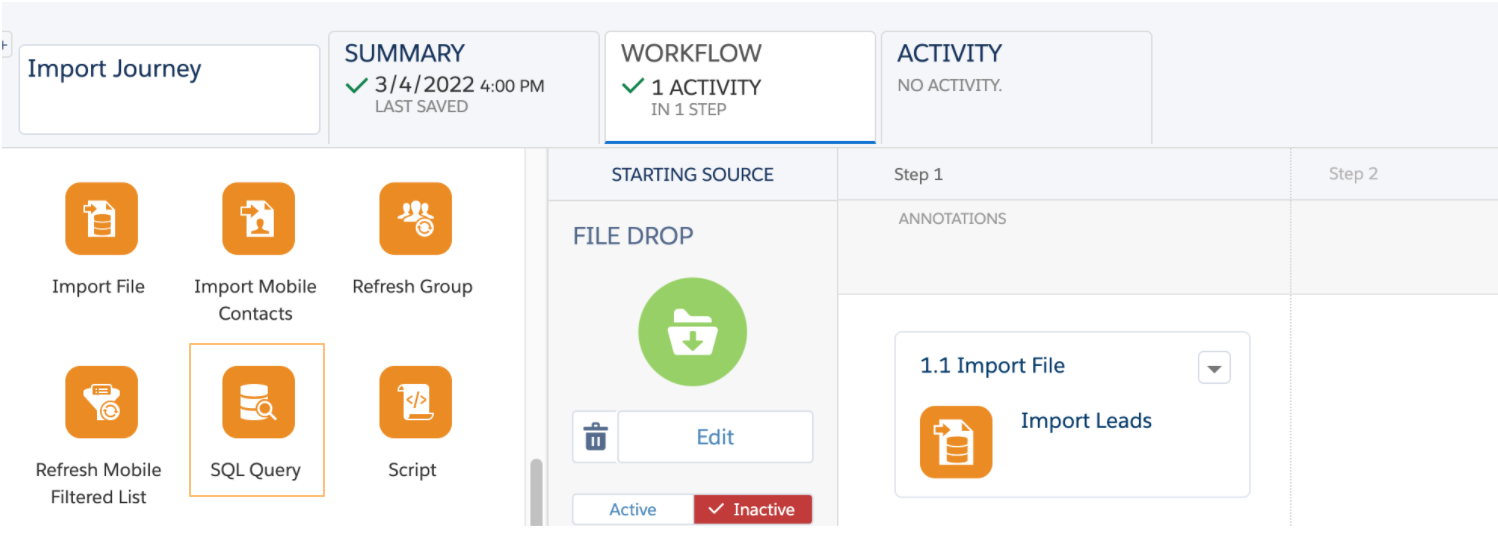
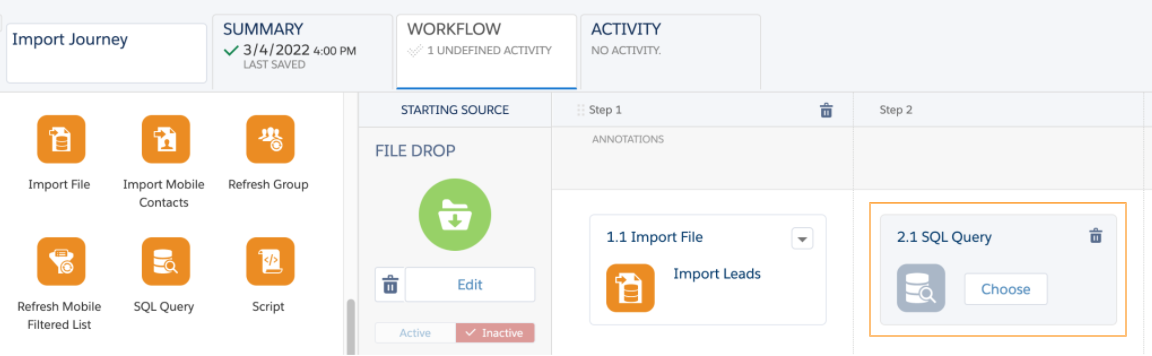
- Click Choose and you will see that in the folder hierarchy on the left, click the DESelect > Selections folder.
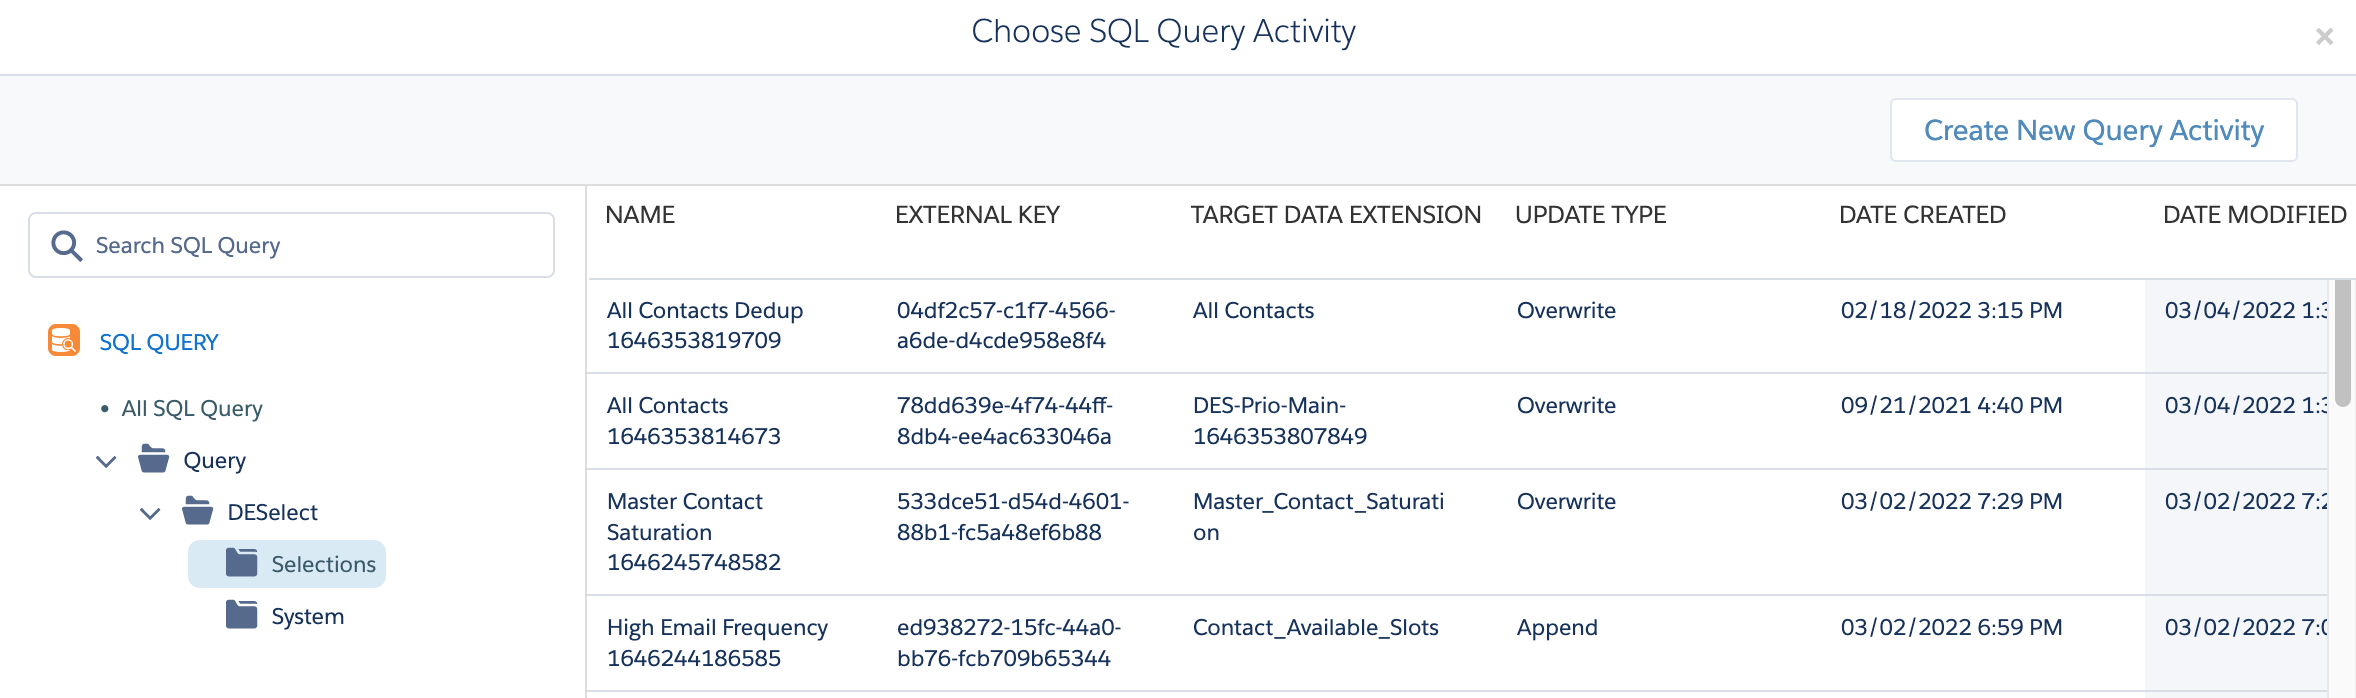
- Choose the one named as your Selection and click Done.
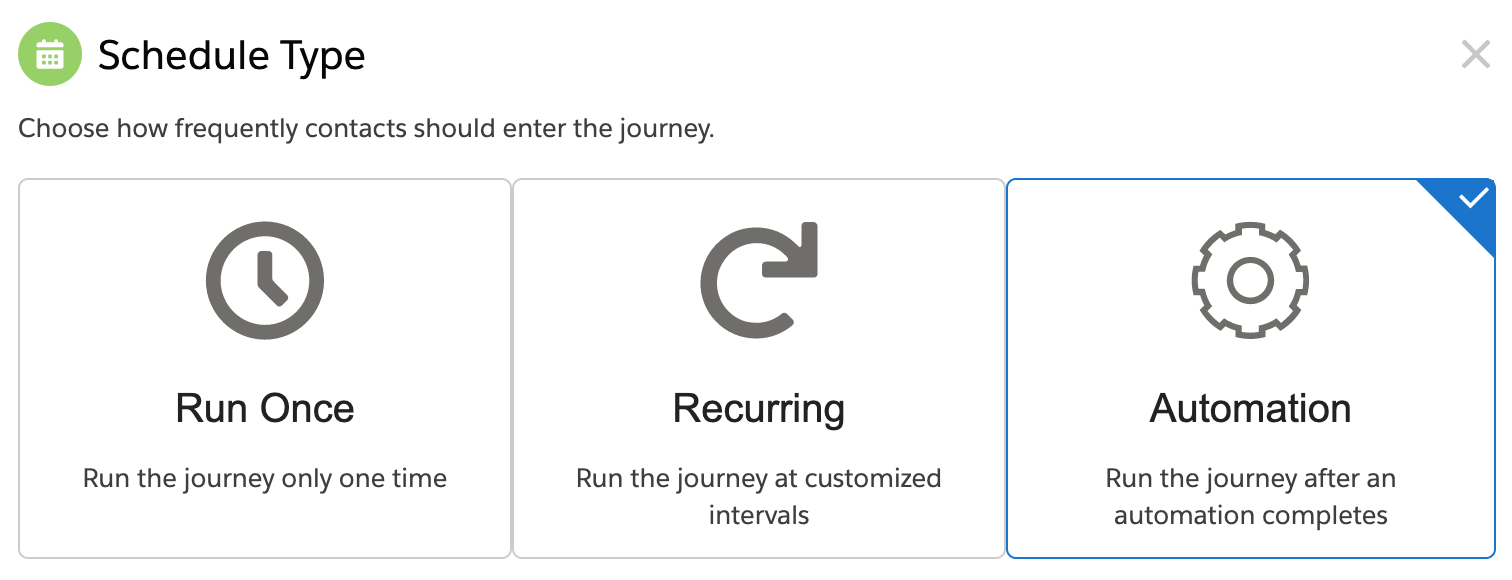
- You can go now to the Journey Builder and choose the Target Data Extension of your Selection as the Entry Point of the Journey. When you click on Schedule, you will see that an option called Automation is available.
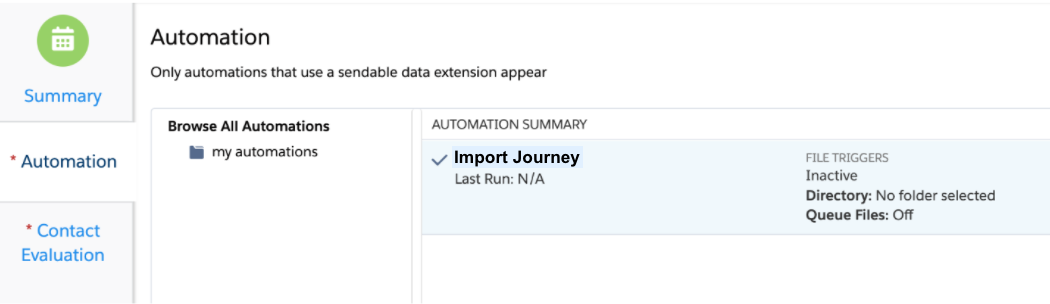
- In the next screen, click Schedule and choose the Automation we created before.
- Save the Journey and activate it when you are ready. If you go back to the Automation, you'll see that a third step was automatically added and contains the execution of the Journey.
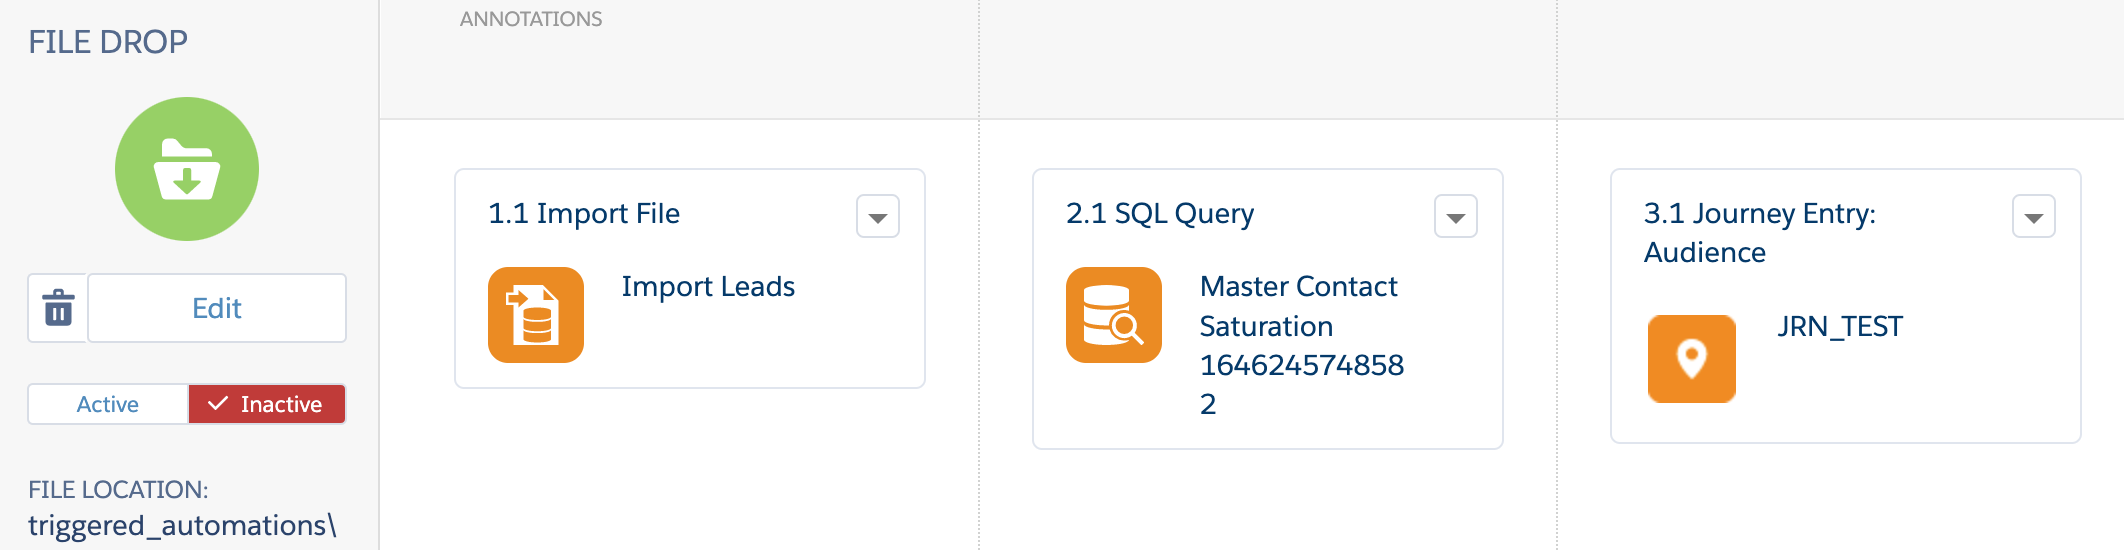
Now, all your activities will be connected and the execution of the steps will depend on the result of the previous ones: if the import activity fails, neither the query nor the Journey will run; if the query fails, the Journey won't run.