Burst with Multiple Filters
In this example, you will set up a burst report with two filters on the regular report.
This example continues the Simple Burst example. If this is your first time doing a burst, check the other example first to learn the basics.
How it works
There are different ways you can set up your non-burst (regular, source, or data record) report, depending on whether you are using a Salesforce report or a Custom Report, you will choose the best option for you. They all end up with the same result.
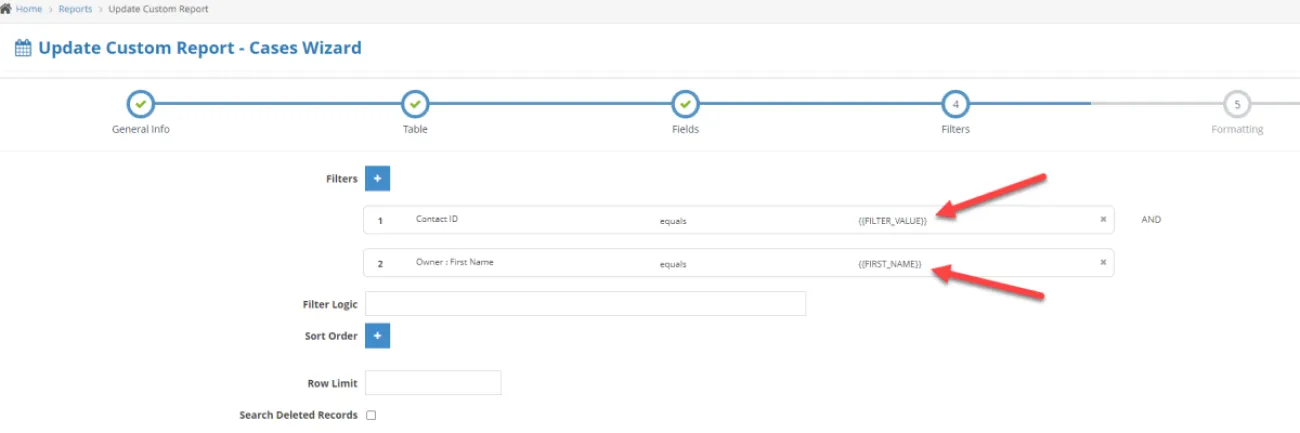
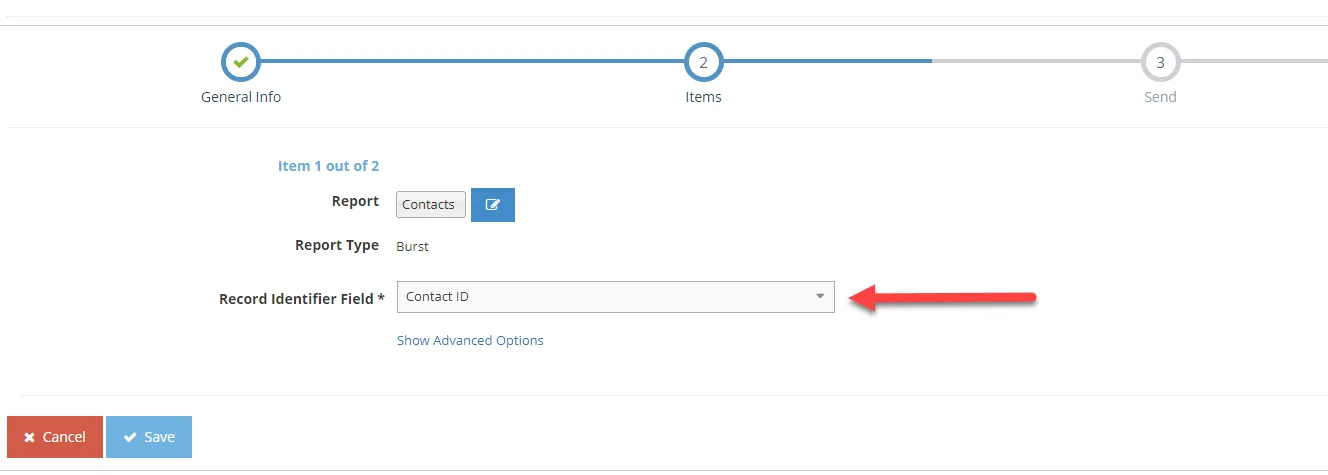
The first filter you will add will always be the standard burst Filter Value which comes from the Record Identifier Field selected on the Burst Report item. In this example, it is Contact ID.
On the non-burst report you will add this by putting in the {{FILTER_VALUE}} token as shown in the examples below. The other tokens will come from the burst report. To find those you will go to the run report page of the burst report and select the icon in the upper right-hand corner.
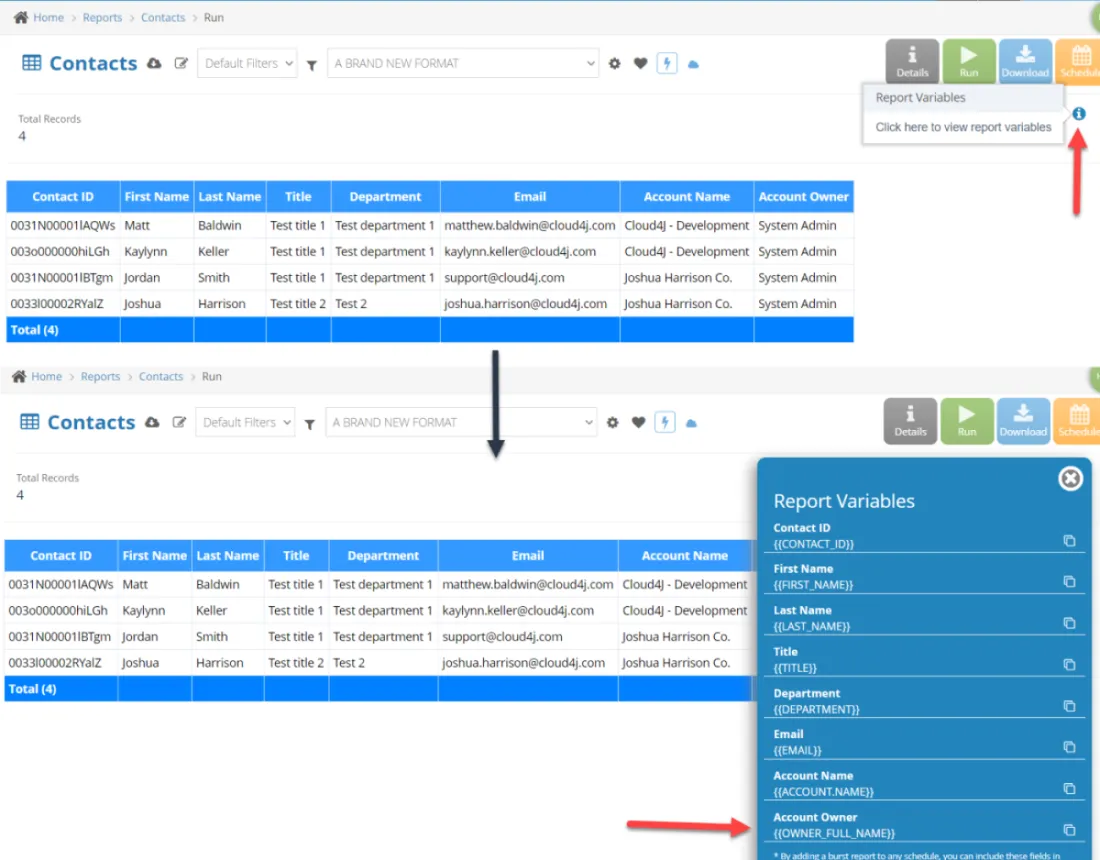
While this example will show how to add two filters, you can add as many filters as you require.
Report setup
Salesforce report
When using a Salesforce report you can go to the Run report page, at the top you can add a new Filter Configuration.
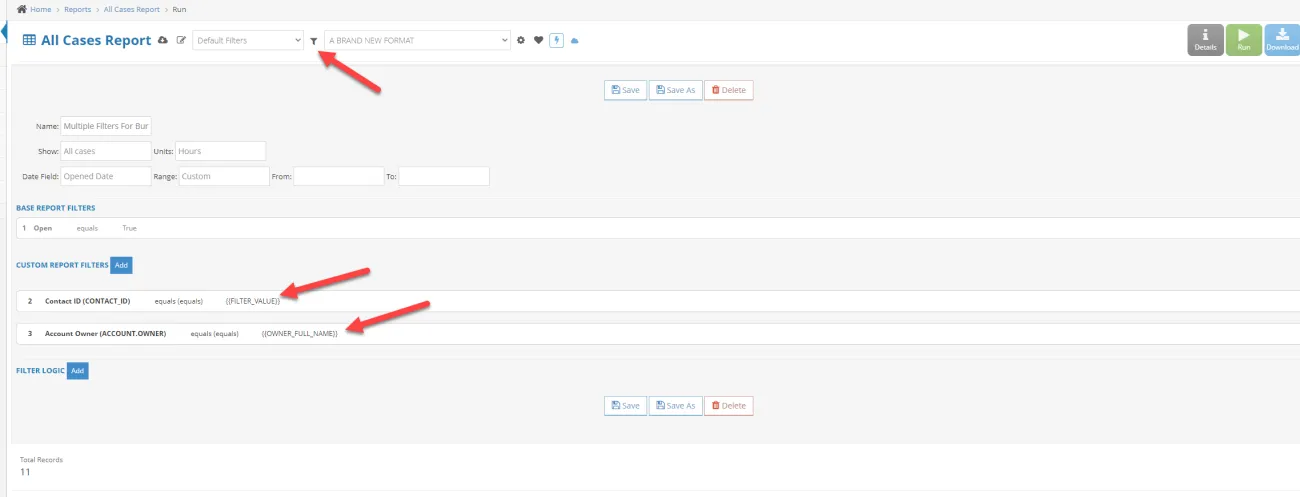
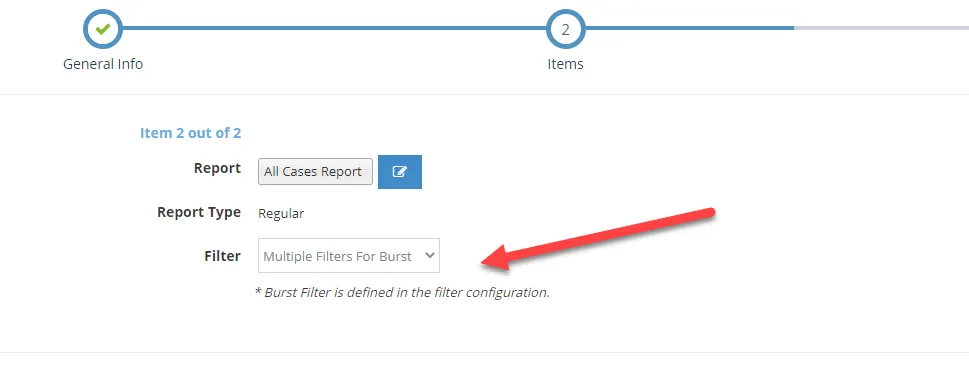
Then when creating the Solution you will be able to select this new filter configuration after you select your report.
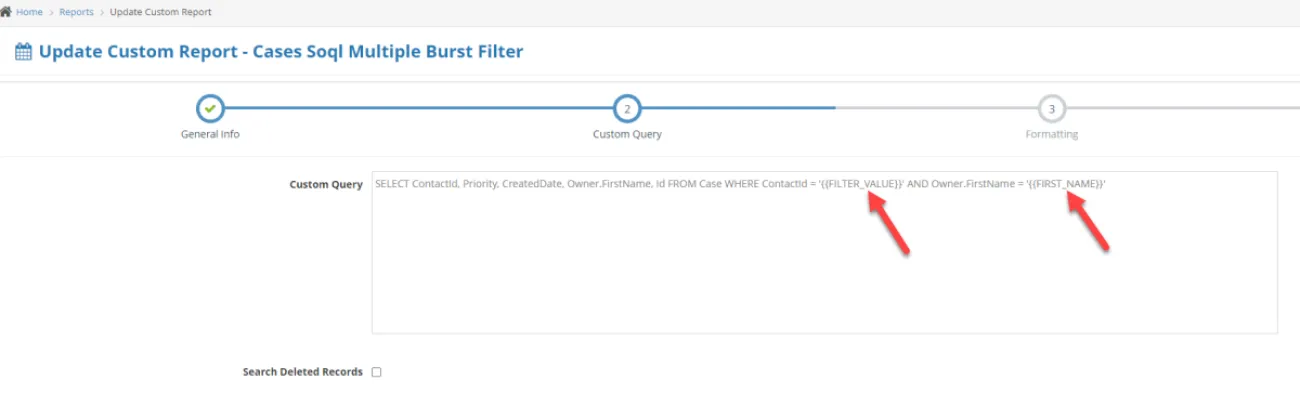
Custom Report using custom SOQL
When using a custom report with your own custom query, you can just add the filters right into the query.
Custom Report using the Custom Report Wizard
When using a custom report that was created with the wizard, if you navigate to the filters step you can add your filters there.