Create & Edit Target Data Extensions
Create a Target Data Extension
- On the Output step, click the Create Data Extension button.
- Provide the name, description, and location of your Data Extension.
Avoid saving Target Data Extensions in the root DESelect folder as this is a system folder. Instead, save them in the Data Extensions folder and subfolders.
- Indicate in the Options if your new Data Extension needs to be sendable or testable and if you need to enable the Retention Settings. Click Continue.
- Now you can see all the fields from the Selected Data Extensions on the left.
- Choose the fields you would like to see in your new Target Data Extension. Select them by:
- drag-and-dropping them to the right.
- double-clicking on them.
- clicking the Add all fields button to add all fields of a selected Data Extension at once.
- Fields on the right-hand side will constitute your Target Data Extension. You can click on the pencil icon and see the details of the field (Field Information). You can edit: name, length of the field, and indicate if it’s a Primary Key and/or Nullable.
Define Target Data Extension fields' maximum length property based on the maximum size of data to be stored in them. For example, if you always store a five-digit CustomerId then limit the field length to five characters.
- If you are satisfied with your new Data Extension, click Save Data Extension. Alternatively, click Cancel to return to the mapping screen without creating the new Data Extension.
- Click Create. Your new Data Extension is now created in Marketing Cloud and available to use within Unaric Segment to write the results of your Selection.
Creating a Target Data Extension generates the field mappings automatically. As such, if your new Target Data Extension includes Id and Email fields, the source Id and email fields will be mapped to the target Id and Email fields respectively.
Use only the necessary fields from Available Data Extensions to your Target Data Extensions instead of selecting all fields. This will lead to less data population.
Edit Target Data Extension Fields
You can modify and add fields to existing Target Data Extensions.
- On the Output step, click the Tools button on the right and choose Edit Data Extension.
- On the screen that opens now, you can:
- Click the pencil icon on a field to change the properties of that field. You can change settings like Name, Length, Default Value, and indicate if a field is Nullable / Primary Key.
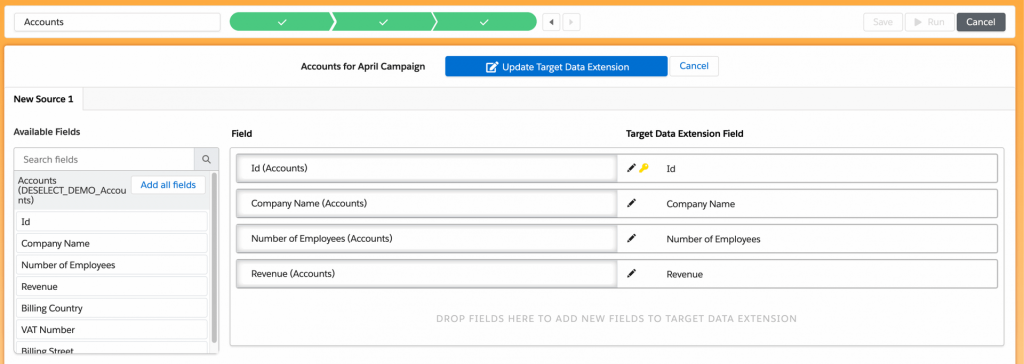
- Add a new field to the Target Data Extension by:
- drag-dropping a field from the Available Fields section to the section on the right.
- double-click a field in the Available Fields section.
- use the Add all fields button to add all fields of a selected Data Extension.
- Click the Update Target Data Extension button to save the changes to the Data Extension or click Cancel to return without changes.
Delete sendable field
If you are trying to delete a field that is being used in a subscriber relationship, you will receive this message:
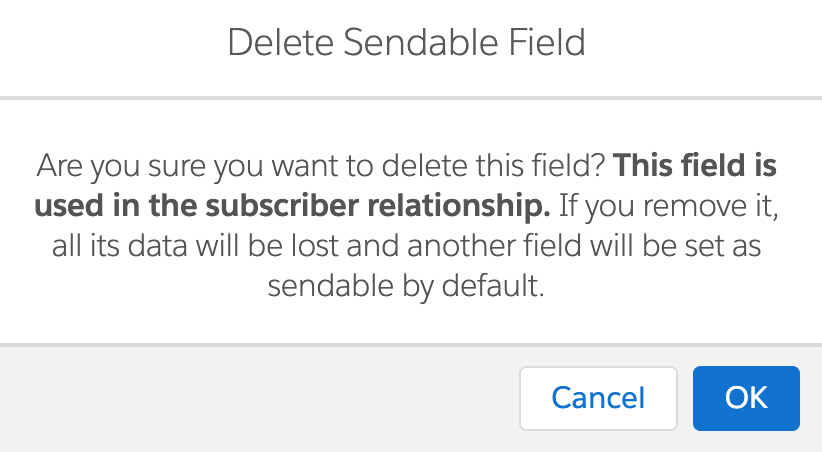
Normally, this can be removed, however, once done, the field being used in the subscriber relationship will be automatically changed to the next field listed on your Target Data Extension.
In case you proceed with deleting the field and decided to add it again on your Target Data Extension, you will be encountering the message below.
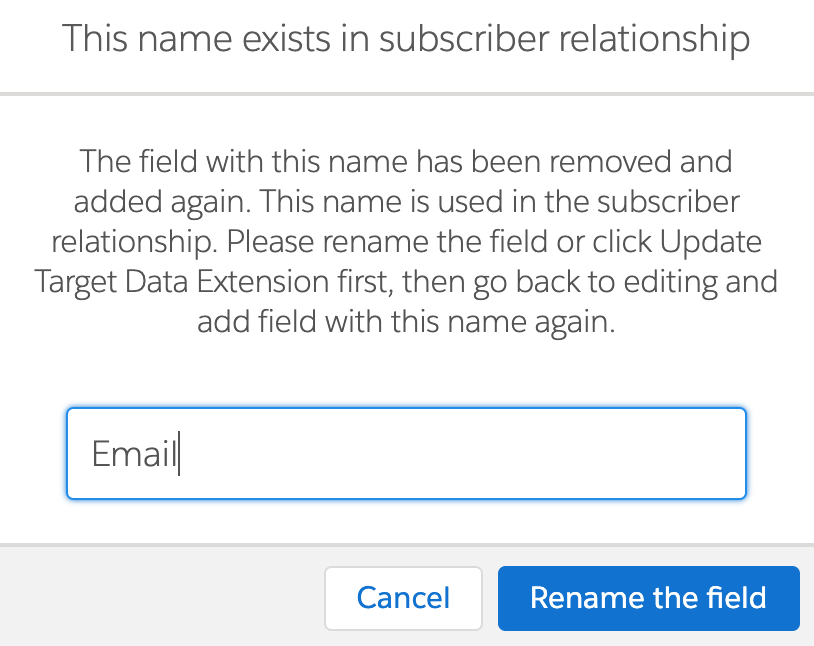
This is because the field name of the priorly deleted field used in your subscriber relationship (since the Target Data Extension is not being updated yet) will have the same field name as what you are adding. Thus, you can provide a new name for the field that you are adding and you can proceed as you normally would.
In this scenario, our recommendation will be to remove the field and add it again in two update steps:
- Remove the field and click Update Target Data Extension.
- Edit the Target Data Extension again and add the field.
- Click Update Target Data Extension to finish.
Modify a field as a Primary Key or Nullable
If you find that the Primary Key and Nullable properties of your fields are grayed out and cannot be edited, you must delete the current Target Data Extension field and re-add it.
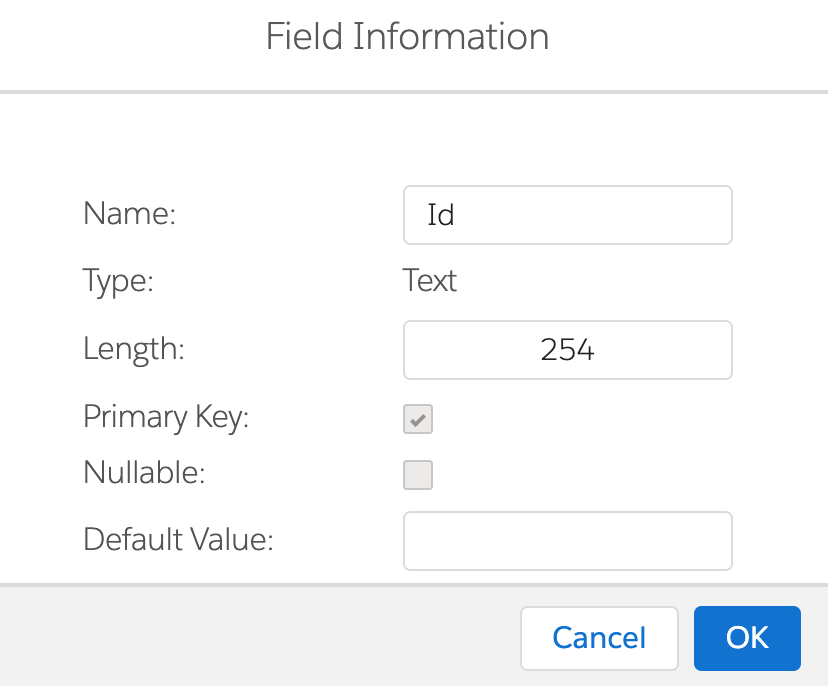
Add a field set as Primary Key or Not nullable field to an existing Target Data Extension
If the Target Data Extension has records on it and you try to add new columns that are non-nullable (like Primary Keys, or regular fields without the Nullable checkbox marked), the update of the Data Extension will result in an error, because adding the column will make the existing records invalid (as they don't have a value for the newly added column)
The workaround consists in empty the Target Data Extension from the Email Studio (opening the Data Extension > Records > Clear Data), and trying to perform the modification again.