Tree Builder
The Tree Builder tab provides an interface to manage hierarchical navigation structures for help content.
Trees represent parent-child relationships among Help Topics, forming a navigable outline like a table of contents. With the Tree Builder, you can search and select pages, add it to a Tree and create and re-organize Help Topics.
Additionally, Trees can be displayed to users using the Tree View component.
Use the Tree Builder
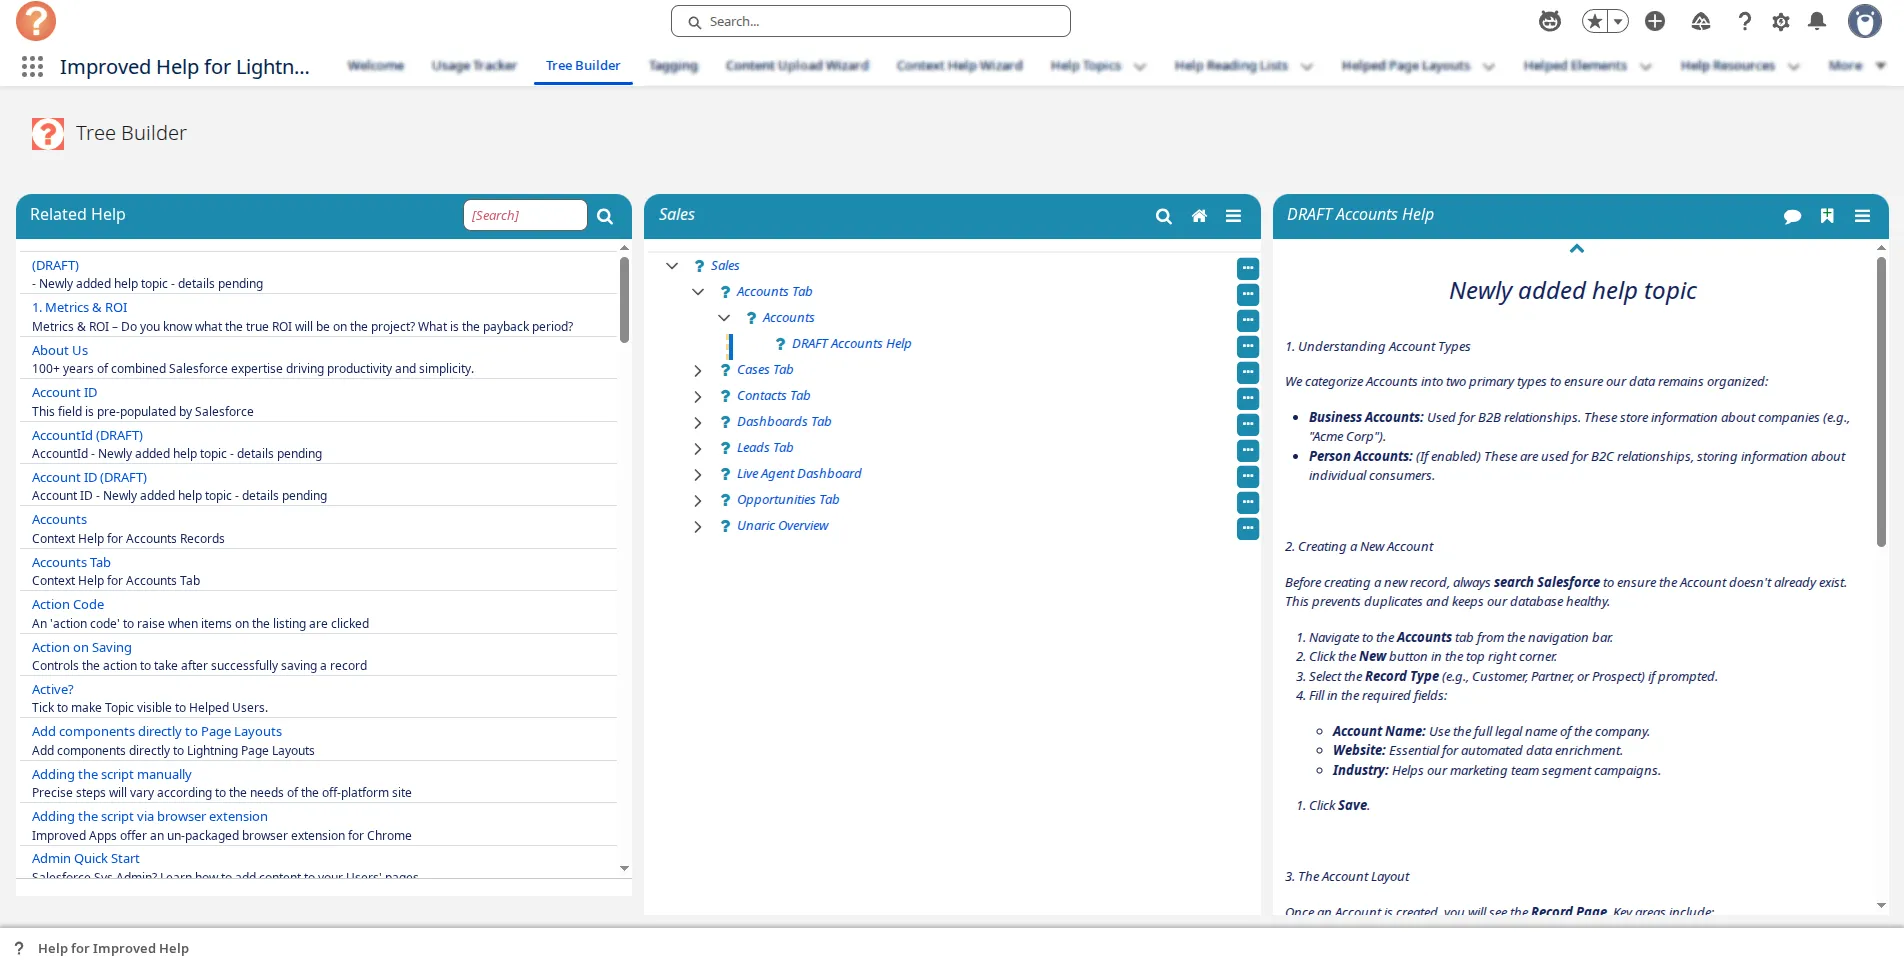
You will find the Tree Builder tab in the Improved Help for Lightning app. To build Trees, you use three panels.
Search panel (Left)
Use the search tool to locate existing Help Topics. You can drag and drop topics from this panel into the tree at the central panel to include them in your structure.
Tree View panel (Centre)
This is where you build and manage your tree structure. You can rearrange topics within the tree to refine the hierarchy and improve usability. Use the search box to find an existing tree. To create a new tree:
- Open the ellipsis menu ( icon).
- Click Add Tree.
- Enter a name for the root topic of your new tree.
To organize Help Topics:
- Open the ellipsis menu ( icon).
- Use the available Add options to create:
- Peer topics (same level)
- Child topics (nested under a parent)
Topic View panel (Right)
The Topic Viewer allows you to view and edit Help Topics. Select a Help Topic to display its content and edit it by opening the ellipsis menu ( icon) and clicking Edit or create a new one selecting New Help Topic.
Set a default Tree
To display a specific tree by default on this screen:
- Open the ellipsis menu in the Tree View ( icon).
- Click Pin Topic.
- Repeat this step in the Topic Viewer. Once pinned, your selected tree will appear as the default when the page is refreshed.