Getting Started
To set up Scan Anything, you need to install the app from Salesforce AppExchange, assign licences and permissions to your users, and create custom fields on your desired objects.
Installation
- Click the Get It Now button to install the application. You will be asked to log in with your Salesforce or Trailblazer.me account if you are not logged in.
- Choose your installation environment:
- Sandbox environment
- Click Install in Sandbox.
- Review the installation details and confirm you agree to the terms. Click Confirm and Install.
- Log in to your Salesforce Sandbox with your sandbox credentials.
- Production environment
- Click Install in Production.
- Review the installation details, confirm terms, and choose which users should have access. Click the checkbox next to "Install for All Users" for the License Manager to control access.
- Click Install. You'll receive an email confirmation from Salesforce once the installation is completed.
Initial setup
1. Assign licenses and permissions
Skip this step if you have installed the package with a site-wide license.
- On Salesforce, go to Setup.
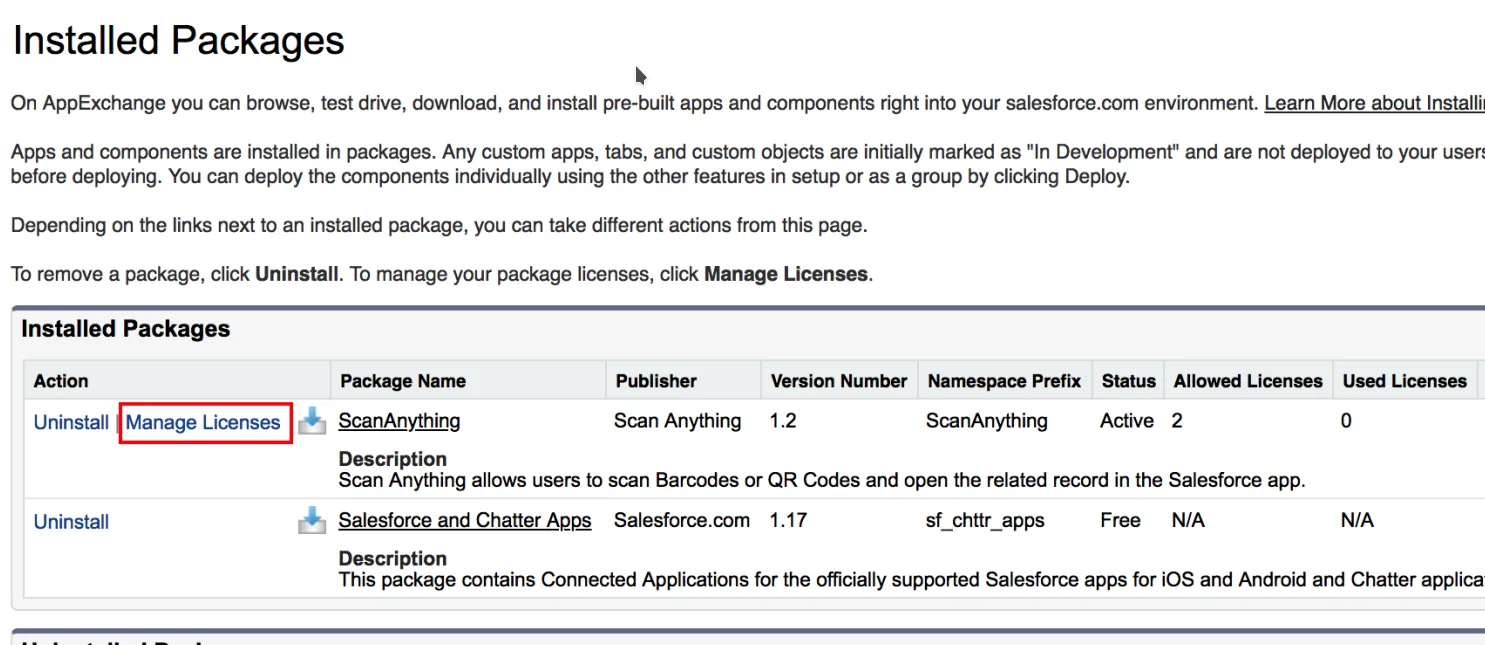
- Navigate to Installed Packages and locate Scan Anything.
- Click Manage Licenses and add the users who need access.
2. Set permissions
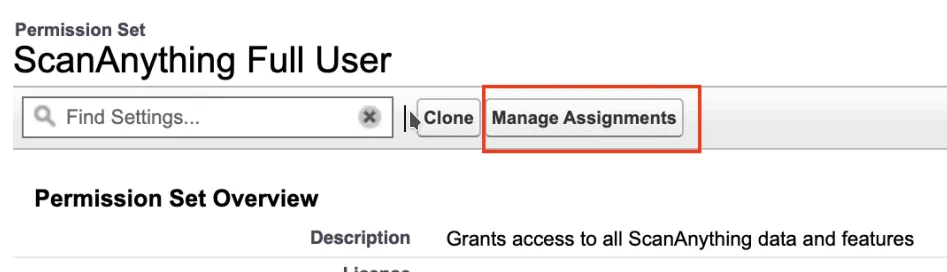
- Go to Setup > Users > Permission Sets and enter Scan Anything Full User.
- Click the Manage Assignments button and add all users who will use Scan Anything
3. Add scannable fields to objects
For matching, Scan Anything looks for fields in your salesforce org with SA_ID__cas API Name. You can add a custom field to any object in your Salesforce org both standard objects and custom objects with the correct API name (SA_ID__c) and Scan Anything will use that field to match the scanned barcode value. Alternatively, Scan Anything will open a record if the Salesforce Record ID is scanned.
To add this field:
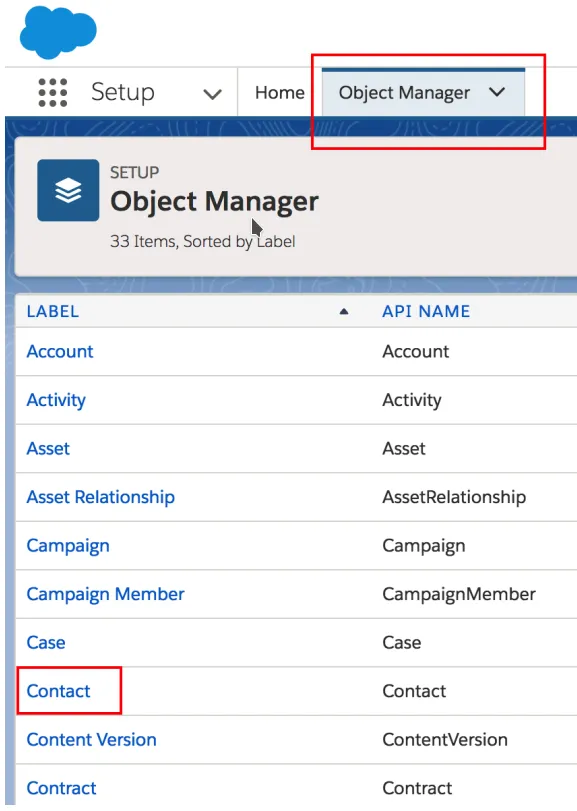
- In Salesforce, go to Setup > Object Manager and select the desired object (e.g., Contact).
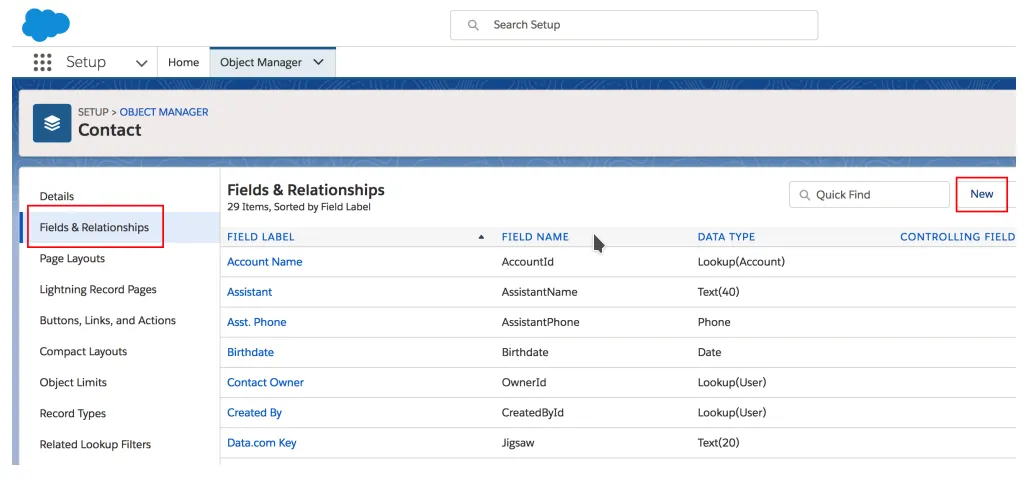
- On the Object tab, go to Fields & Relationships and click the New button to create a custom field.
- Choose Text as the data type and click Next.
- In the next step, introduce these specifications: Field Name: SA_ID (mandatory) Length: 120 (recommended) External ID checkbox must be checked Check Unique if you wish to enforce unique values for barcodes Complete the Description, Help Text, Required, and case sensitivity fields as desired.
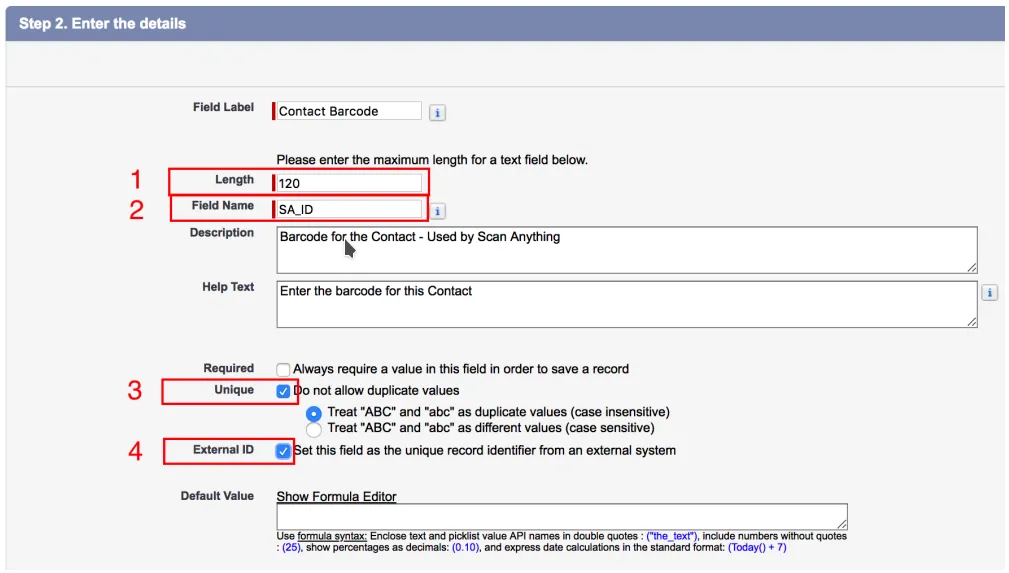
- Click Next.
- In the next step, set the field-level security and add to page layouts as desired. Click Save.
In case you added a barcode field to an object but Scan Anything does not recognize it, there are two possible reasons that this might be happening:
- Your field might not be set correctly. Check that:
- The field API name is SA_ID
- The field is set as an external ID
- The field must be set as Unique
- You might need to clear the cache on the Scan Anything app. If you just added the field, go into the Scan Anything app, tap the gear icon, and select Clear Cache. This will tell Scan Anything to re-read all the objects and look for new SA_ID fields. You can also re-login.
4. Adding value to the field
After setting up the field for the barcode, you need to add values to the field of the object. For example, if you want to create a barcode for a contact:
- Go to the Contacts object, select a contact, and then select the Details tab.
- Edit the record and record a value in the Contact Barcode field, then click Save.
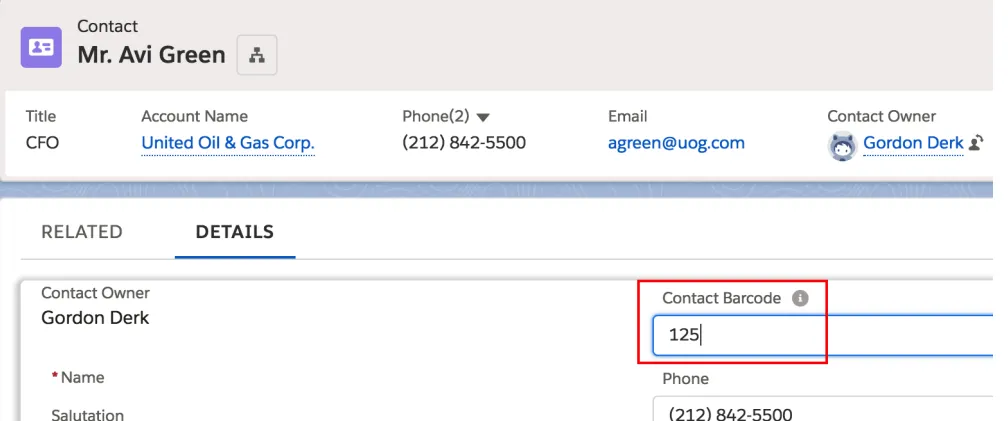
- When Scan Anything scans a barcode with 125 as value, the record for Avi Green will open on their Salesforce app.
Next steps
After setting up Scan Anything, you can start using its features: